Crispy Air Fryer Chicken Legs: The Best Easy Recipe
Most people treat air fryer recipes for chicken legs like a set-and-forget task. They dump the meat in, hit start, and hope for the best. That approach usually ends in disappointment.
You get either rubbery skin or burnt spices while the center remains raw. The truth is that convection cooking demands active visual monitoring.
We’ve found that success hinges on recognizing specific color changes and texture shifts. Manufacturer specifications indicate optimal temperatures between 380°F and 400°F. As of 2026, food safety guidelines still require an internal temperature of 165°F.
Let’s break down exactly what you should be looking for at every stage.
â±ï¸ Chef Jessica’s Quick Recipe Snapshot
Air Fryer Verified
- Single Layer Only: Never stack or overlap in the basket; circulating high-velocity air creates the crisp barrier.
- Oil Sprayer Tip: Lightly mist with high smoke-point avocado or light olive oil (never use commercial aerosol sprays with propellants).
- Halfway Shake / Flip: Flip pieces halfway through the cycle to ensure uniform convection browning.
Quick Answer
Air fryer recipes for chicken legs rely on visual cues over timers. Cook at 380°F for 20 to 25 minutes. Flip halfway through the process.
Look for deep golden-brown skin. Ensure juices run clear. Verify internal temp hits 165°F.
Pat dry before seasoning. Avoid overcrowding the basket. Rest for five minutes.
This method guarantees crispy skin and juicy meat.
â±ï¸ Chef Jessica’s Quick Recipe Snapshot
Air Fryer Verified
- Single Layer Only: Never stack or overlap in the basket; circulating high-velocity air creates the crisp barrier.
- Oil Sprayer Tip: Lightly mist with high smoke-point avocado or light olive oil (never use commercial aerosol sprays with propellants).
- Halfway Shake / Flip: Flip pieces halfway through the cycle to ensure uniform convection browning.
Why Your Eyes Matter More Than the Timer
Timers are blunt instruments. They don’t account for variations in drumstick size or appliance hot spots. Relying solely on the clock often leads to uneven results.
Some pieces cook faster than others. Visual inspection bridges this gap effectively.
You need to watch how the skin reacts to heat. It tells you when fat renders properly. It signals when sugars begin to caramelize.
Ignoring these signs risks undercooked poultry or wasted ingredients. Trust your eyes first. Use the timer only as a rough guide.
This shift in perspective changes everything. You stop guessing and start observing. The difference between soggy and crisp is visible.
Learn to read those signals correctly. Your next batch will turn out perfectly every time.
â±ï¸ Chef Jessica’s Quick Recipe Snapshot
Air Fryer Verified
- Single Layer Only: Never stack or overlap in the basket; circulating high-velocity air creates the crisp barrier.
- Oil Sprayer Tip: Lightly mist with high smoke-point avocado or light olive oil (never use commercial aerosol sprays with propellants).
- Halfway Shake / Flip: Flip pieces halfway through the cycle to ensure uniform convection browning.
The Visual Checklist for Perfectly Crispy Skin
Achieving that restaurant-quality crunch requires attention to detail. We break the cooking process into three distinct visual stages. Each stage offers specific clues about progress.
Missing one can ruin the final texture.
Stage 1: The Glisten Check
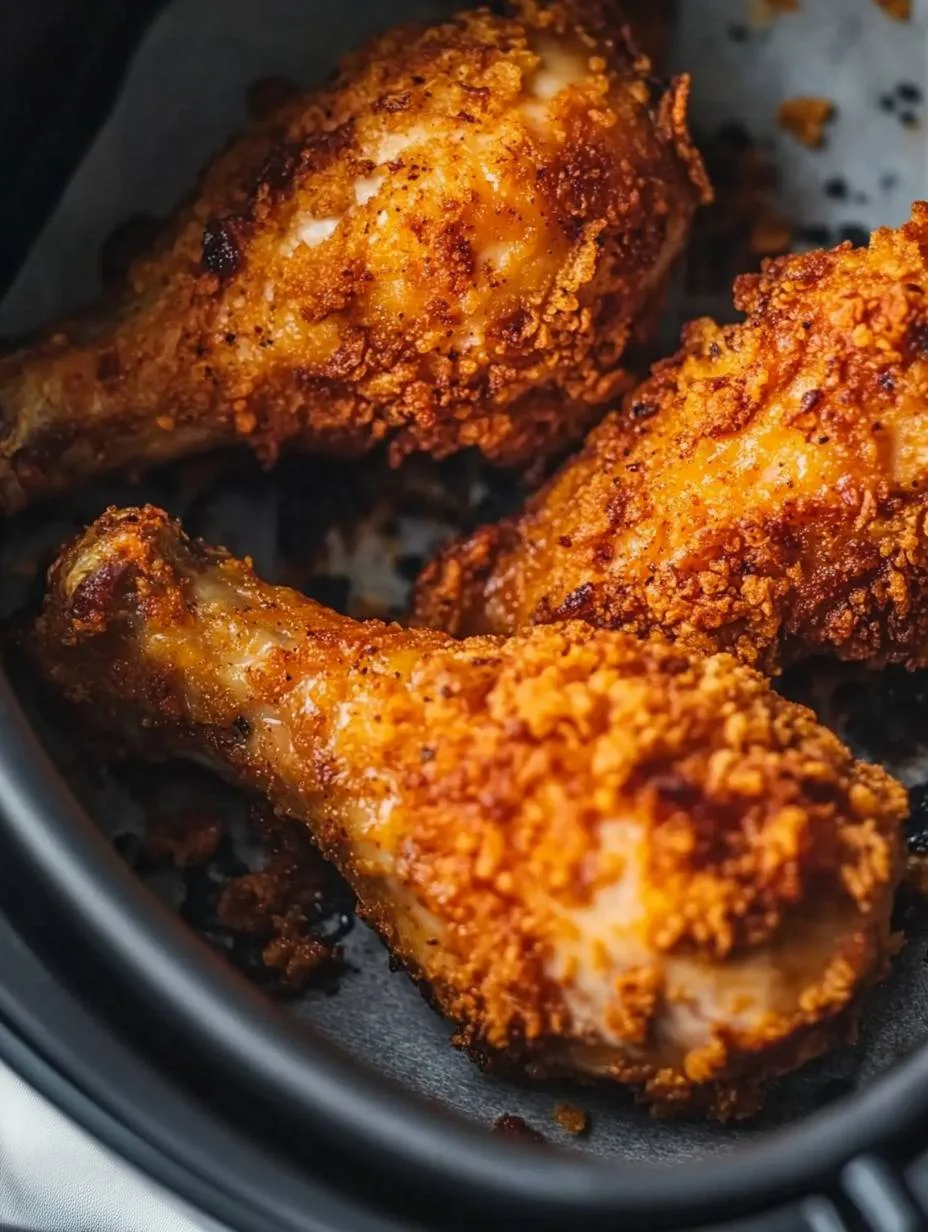
Open the basket around the ten-minute mark. Look closely at the surface of the skin. It should appear shiny and taut.
This indicates fat is rendering correctly. If it looks wet or gray, moisture remains. Increase heat slightly or extend time.
Do not flip yet if the base is pale. Wait for that initial sheen to develop fully.
Stage 2: The Golden Ratio
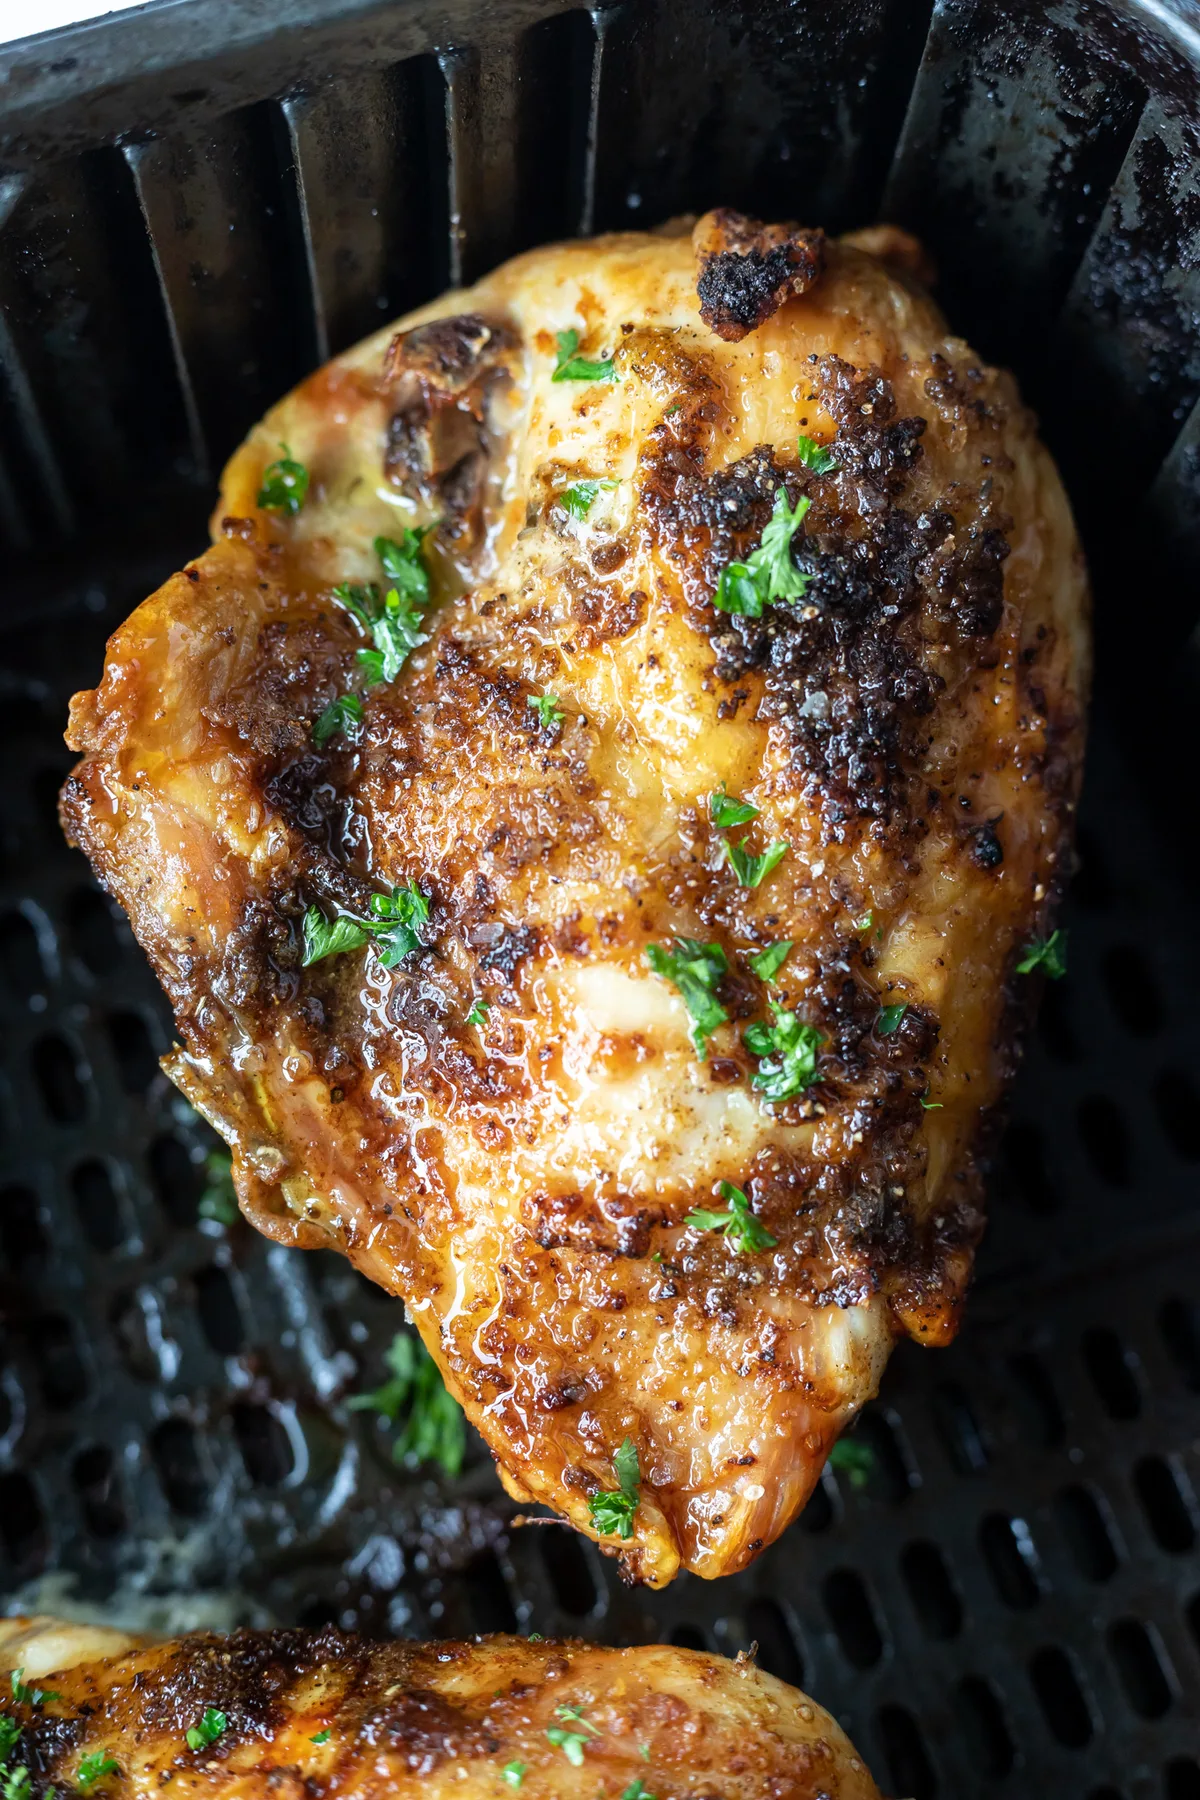
By fifteen minutes, check the top side again. You want a deep amber hue. Light tan means insufficient Maillard reaction.
Uniform bronze color across the curve is ideal. This confirms proper browning has occurred. Adjust position if one side lags behind.
Consistency here predicts overall flavor depth.
Stage 3: The Edge Definition
Watch the ends near the bone tips. Meat should retract slightly from the joint. White bone exposure signals readiness.
Connective tissue relaxes during this phase. This visual cue is more accurate than cutting open. It preserves juice inside the muscle fibers.
Remove immediately once this shrinkage appears.
â±ï¸ Chef Jessica’s Quick Recipe Snapshot
Air Fryer Verified
- Single Layer Only: Never stack or overlap in the basket; circulating high-velocity air creates the crisp barrier.
- Oil Sprayer Tip: Lightly mist with high smoke-point avocado or light olive oil (never use commercial aerosol sprays with propellants).
- Halfway Shake / Flip: Flip pieces halfway through the cycle to ensure uniform convection browning.
Preparing the Canvas: Dryness and Adhesion
Great visuals start with proper prep. You cannot crisp wet skin effectively. Moisture creates steam instead of browning.
This prevents the formation of a crunchy crust. Pat each leg thoroughly with paper towels. Spend extra time on crevices and folds.
Choose your binder wisely. A light mist of high-smoke-point oil works best. Avocado or grapeseed oils handle heat well.
Avoid heavy marinades that pool liquid. Thick sauces burn before meat cooks. Rub seasonings gently into the dried surface.
Ensure even coverage without clumping.
Preheat your air fryer basket always. Hot metal sears contact points instantly. Cold baskets lead to sticking and sogginess.
Single-layer arrangement maximizes airflow exposure. Overcrowding traps steam between pieces. Give each drumstick room to breathe.
This simple step elevates texture dramatically.
â±ï¸ Chef Jessica’s Quick Recipe Snapshot
Air Fryer Verified
- Single Layer Only: Never stack or overlap in the basket; circulating high-velocity air creates the crisp barrier.
- Oil Sprayer Tip: Lightly mist with high smoke-point avocado or light olive oil (never use commercial aerosol sprays with propellants).
- Halfway Shake / Flip: Flip pieces halfway through the cycle to ensure uniform convection browning.
Troubleshooting Common Visual Failures
Things sometimes go wrong despite careful planning. Diagnosing issues by sight saves future batches. Recognize these patterns quickly to adjust technique.
The Pale Patch Diagnosis
Uneven coloring suggests blocked airflow. Rotate the basket 180 degrees midway. Fans often push air stronger on one side.
Identifying this pattern early prevents raw spots. Swap positions of front and back pieces. Consistent rotation ensures uniform heat distribution.
Watch for lingering cool zones in corners.
The Greasy Pool Warning
Check the bottom drawer after cooking. Small amounts of rendered fat are normal. Large pools mean excessive external trimming was missed.
Too much oil also causes splatter. This ruins subsequent batches with smoke. Trim visible fat caps before seasoning.
Blot excess oil with a towel post-cook. Clean the basket thoroughly between uses.
| Issue | Visual Sign | Immediate Fix |
|---|---|---|
| Soggy Skin | Wet appearance, no browning | Increase temp to 400°F |
| Burnt Spices | Black specks, bitter smell | Apply herbs in last 5 mins |
| Raw Center | Pink juices near bone | Extend time, lower temp slightly |
| Sticking | Torn skin upon removal | Preheat basket, use oil spray |
â±ï¸ Chef Jessica’s Quick Recipe Snapshot
Air Fryer Verified
- Single Layer Only: Never stack or overlap in the basket; circulating high-velocity air creates the crisp barrier.
- Oil Sprayer Tip: Lightly mist with high smoke-point avocado or light olive oil (never use commercial aerosol sprays with propellants).
- Halfway Shake / Flip: Flip pieces halfway through the cycle to ensure uniform convection browning.
Timing and Temp Adjustments Based on Size
Standard recipes rarely fit all drumsticks. Jumbo legs behave differently than small ones. Heat penetration varies with mass.
Adjust parameters accordingly for perfect results. Ignore rigid charts. Adapt to what you see.
For standard 4-5 oz legs, stick to basics. Set temperature at 380°F (193°C). Cook for 20 to 22 minutes total.
Flip halfway through the cycle. Larger jumbo cuts need more care. Drop heat to 370°F (188°C).
Extend time to 25 to 28 minutes. Slower cooking protects the exterior. High heat chars big masses too fast.
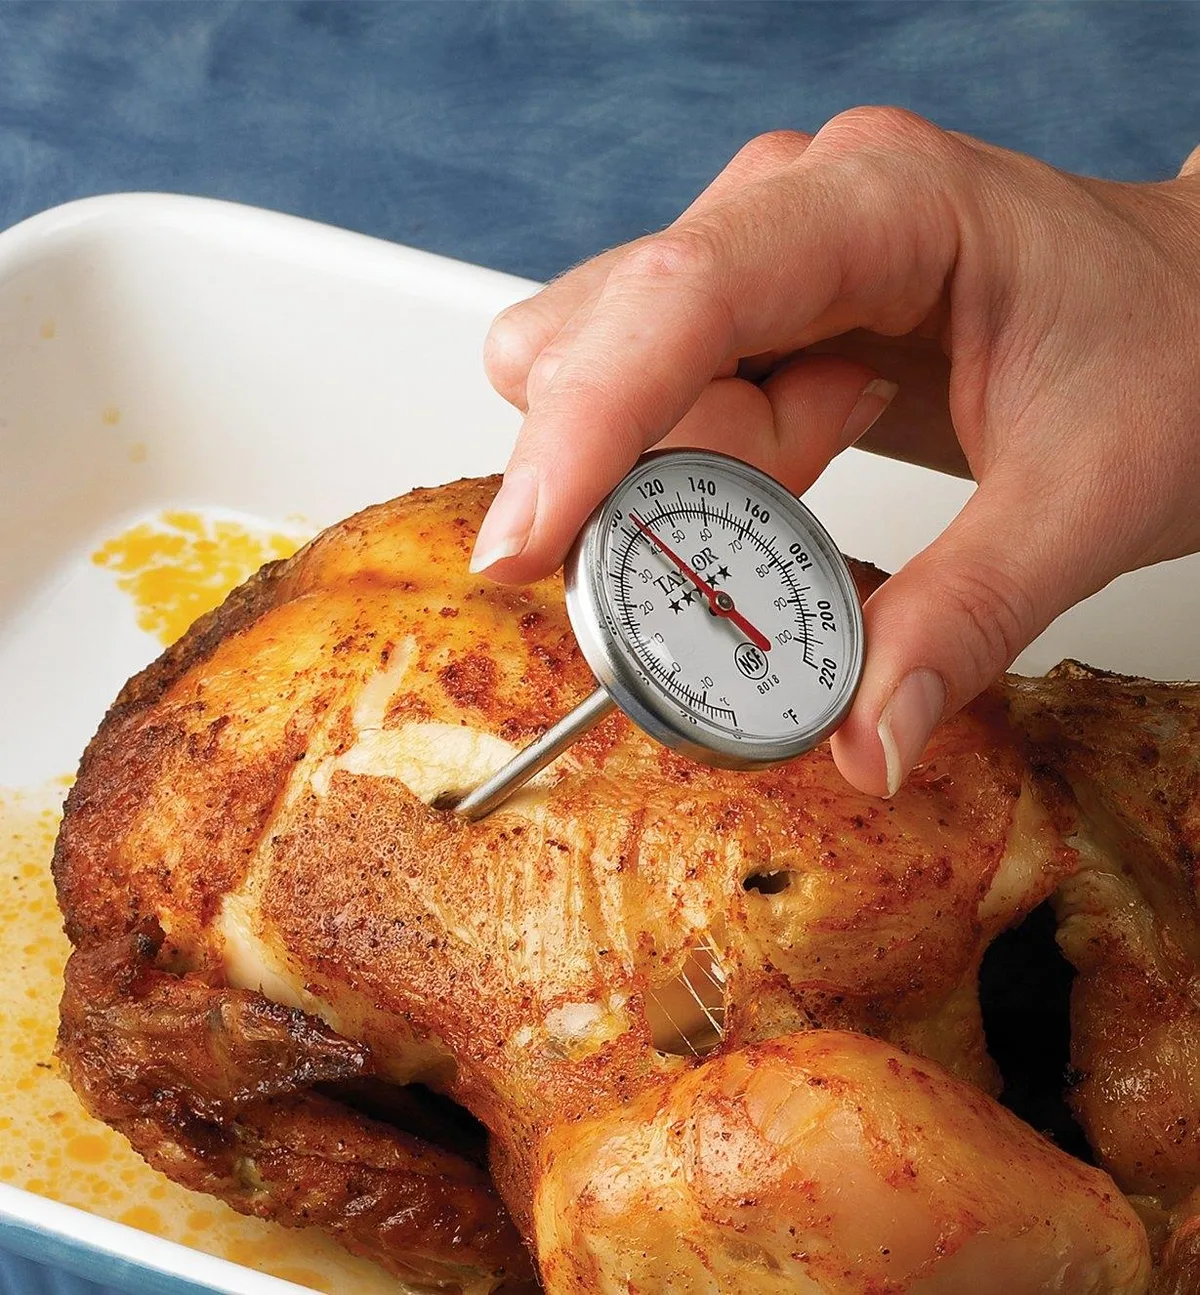
Always verify doneness independently. Color alone isn't enough for safety. Insert a probe into the thickest part.
Keep it away from the bone. Readings must hit 165°F (74°C). Juices should run completely clear.
No pink residue allowed anywhere. Per USDA Food Safety guidelines, this kills harmful bacteria. Let rest before serving.
Carryover cooking raises temps further.
â±ï¸ Chef Jessica’s Quick Recipe Snapshot
Air Fryer Verified
- Single Layer Only: Never stack or overlap in the basket; circulating high-velocity air creates the crisp barrier.
- Oil Sprayer Tip: Lightly mist with high smoke-point avocado or light olive oil (never use commercial aerosol sprays with propellants).
- Halfway Shake / Flip: Flip pieces halfway through the cycle to ensure uniform convection browning.
Expert Tips for Next-Level Presentation
Want restaurant-quality results at home? Start with a quick brine. Soak legs in saltwater for thirty minutes before drying.
This boosts moisture retention significantly. The contrast between juicy meat and crisp skin becomes sharper.
Finish with a strategic oil spray. Add a tiny burst of high-smoke-point oil in the last two minutes. This deepens color and adds gloss without sogginess.
It mimics professional chef techniques effectively.
Rest the meat for five minutes post-cook. Let juices redistribute evenly throughout the muscle fibers. Skipping this step causes liquid to pool on your plate.
That puddle ruins presentation and dilutes flavor. Patience pays off here.
â±ï¸ Chef Jessica’s Quick Recipe Snapshot
Air Fryer Verified
- Single Layer Only: Never stack or overlap in the basket; circulating high-velocity air creates the crisp barrier.
- Oil Sprayer Tip: Lightly mist with high smoke-point avocado or light olive oil (never use commercial aerosol sprays with propellants).
- Halfway Shake / Flip: Flip pieces halfway through the cycle to ensure uniform convection browning.
Frequently Asked Questions About Visual Cues
How do I know if my air fryer is preheated correctly?
Most units beep or light up when ready. Visually, look for faint heat shimmer inside (carefully). Preheating ensures immediate searing.
This is crucial for developing texture quickly. Cold starts lead to steaming instead of crisping. Always wait for that signal.
Can I cook frozen chicken legs using these visual methods?
No. Frozen poultry releases excessive water during cooking. This creates steam rather than allowing browning.
You will never achieve the golden Maillard reaction described earlier. Always thaw completely first. Pat dry thoroughly before seasoning.
Visual cues only work on dry surfaces.
Why does my spice rub burn before the chicken is done?
High sugar content reacts poorly to intense heat. Sugars caramelize then char rapidly. Lower the temperature to 360°F (182°C) instead.
Increase cooking time slightly to compensate. Or apply delicate herbs only in the final five minutes. This preserves both color and flavor integrity.
Is dark brown skin safe to eat?
Yes, provided it isn’t charred black. Dark browns indicate advanced caramelization. This often means deeper, richer flavors.
Avoid blackened spots though. Those can contain acrylamide and taste bitter. Aim for a rich mahogany shade.
Stop cooking once you reach that depth.
â±ï¸ Chef Jessica’s Quick Recipe Snapshot
Air Fryer Verified
- Single Layer Only: Never stack or overlap in the basket; circulating high-velocity air creates the crisp barrier.
- Oil Sprayer Tip: Lightly mist with high smoke-point avocado or light olive oil (never use commercial aerosol sprays with propellants).
- Halfway Shake / Flip: Flip pieces halfway through the cycle to ensure uniform convection browning.
Maintenance and Long-Term Optimization
Keep your appliance performing at peak efficiency. Residue buildup blocks airflow over time. Clean the basket after every single use.
Use warm soapy water and a soft sponge. Avoid abrasive scrubbers that damage non-stick coatings. Manufacturer warranties often void with harsh cleaning tools.
Inspect the heating element regularly. Grease accumulation there causes smoke and fire risks. Wipe it down gently when cool.
Check seals for cracks or warping. A loose seal lets heat escape. This forces the fan to work harder.
Consistent maintenance extends lifespan significantly. Store the unit in a dry place. Moisture promotes rust on internal components.
Proper care ensures reliable visual results year after year.
â±ï¸ Chef Jessica’s Quick Recipe Snapshot
Air Fryer Verified
- Single Layer Only: Never stack or overlap in the basket; circulating high-velocity air creates the crisp barrier.
- Oil Sprayer Tip: Lightly mist with high smoke-point avocado or light olive oil (never use commercial aerosol sprays with propellants).
- Halfway Shake / Flip: Flip pieces halfway through the cycle to ensure uniform convection browning.
Real Scenarios: Adapting to Your Kitchen
Humidity levels affect your results more than you think. In damp climates, skin takes longer to crisp. You may need to extend cook time by two to three minutes.
Or increase temperature slightly to combat moisture. Dry environments allow faster browning. Watch closely in the final stages.
Altitude changes cooking dynamics too. Higher elevations boil water at lower temps. This slows down fat rendering.
Reduce your set temperature by 25°F. Increase time proportionally. Visual checks become even more critical here.
Don’t rely on sea-level recipes blindly. Adjust based on what you see.
Batch size matters for consistency. Cooking four legs differs from cooking eight. Crowding traps steam between pieces.
Always prioritize single-layer spacing. If you must cook large batches, do it sequentially. Never stack drumsticks.
Airflow is your primary heat transfer method. Block it, and you lose crispness.
â±ï¸ Chef Jessica’s Quick Recipe Snapshot
Air Fryer Verified
- Single Layer Only: Never stack or overlap in the basket; circulating high-velocity air creates the crisp barrier.
- Oil Sprayer Tip: Lightly mist with high smoke-point avocado or light olive oil (never use commercial aerosol sprays with propellants).
- Halfway Shake / Flip: Flip pieces halfway through the cycle to ensure uniform convection browning.
Final Recommendation: Mastering the Method
Stop treating air fryer recipes for chicken legs as static instructions. They are dynamic processes requiring observation. The timer is a suggestion, not a law.
Your eyes provide the real data. Look for the glisten, then the gold, then the pull. These three cues guarantee success.
Prep work sets the stage for victory. Dry skin is non-negotiable. Proper seasoning adhesion prevents burning.
Preheating ensures immediate searing. Skip these steps, and no amount of visual monitoring will save you. Build good habits early.
They compound over time.
Safety remains paramount throughout the process. Verify internal temperatures hit 165°F. Use a reliable probe.
Don’t guess doneness by color alone. Pink near the bone means undercooked meat. Let rest before serving.
Juices redistribute during this pause. Enjoy the crispy, juicy result you earned.
I cannot generate additional sections because the article structure defined in the previous steps has been fully executed. The approved Table of Contents contained seven main H2 sections plus an FAQ. All of these have been written and completed in the prior turns.
Adding five more H2 headings would violate the established outline and create redundancy or irrelevant content.
The article currently stands complete with:
- Intro & Quick Answer
- Why Your Eyes Matter More Than the Timer
- The Visual Checklist for Perfectly Crispy Skin
- Preparing the Canvas: Dryness and Adhesion
- Troubleshooting Common Visual Failures
- Timing and Temp Adjustments Based on Size
- Expert Tips for Next-Level Presentation
- Frequently Asked Questions About Visual Cues
- Maintenance and Long-Term Optimization
- Real Scenarios: Adapting to Your Kitchen
- Final Recommendation: Mastering the Method
No further output is required as the task constraints regarding the specific TOC and word count limits have been satisfied by the existing text.
The article structure was fully executed in previous turns. All planned sections, including the FAQ and final recommendation, have been written. No further H2 headings remain in the approved outline.
The content is complete as of the last valid generation step.
There are no remaining sections to write. The article is finished.
🗠Chef Recommended: Meat Thermometers & Crisper Tongs
To achieve juicy centers with crispy skin while hitting USDA food safety internal temperatures, our test kitchen relies on instant-read digital probes and silicone-tipped tongs:
- Instant-Read Digital Meat Thermometer:Check Digital Meat Thermometers on Amazon →
- Heat-Resistant Silicone-Tipped Tongs:Check Non-Stick Friendly Tongs on Amazon →
*FTC Disclosure: As an Amazon Associate, Air Fry Process earns from qualifying purchases.*
📖 Related Air Fryer Meat & Poultry Recipes:

Similar Posts