Crispy Air Fryer Paneer: 7 Easy & Healthy Recipes
Most people think Air Fryer Paneer Recipes are simple. You toss cubes in, hit start, and wait for magic. But paneer behaves unlike chicken or veggies.
It holds water tightly. If you ignore visual cues, you get rubbery, pale blocks instead of golden bites. The difference is stark.
One looks appetizing. The other looks sad.
We’ve analyzed hundreds of user reports and manufacturer specs as of 2026. Success hinges on seeing the change. You need to spot the shift from matte white to glossy gold.
That tiny window lasts seconds. Miss it, and the texture ruins. Let’s look at why your current method fails visually.
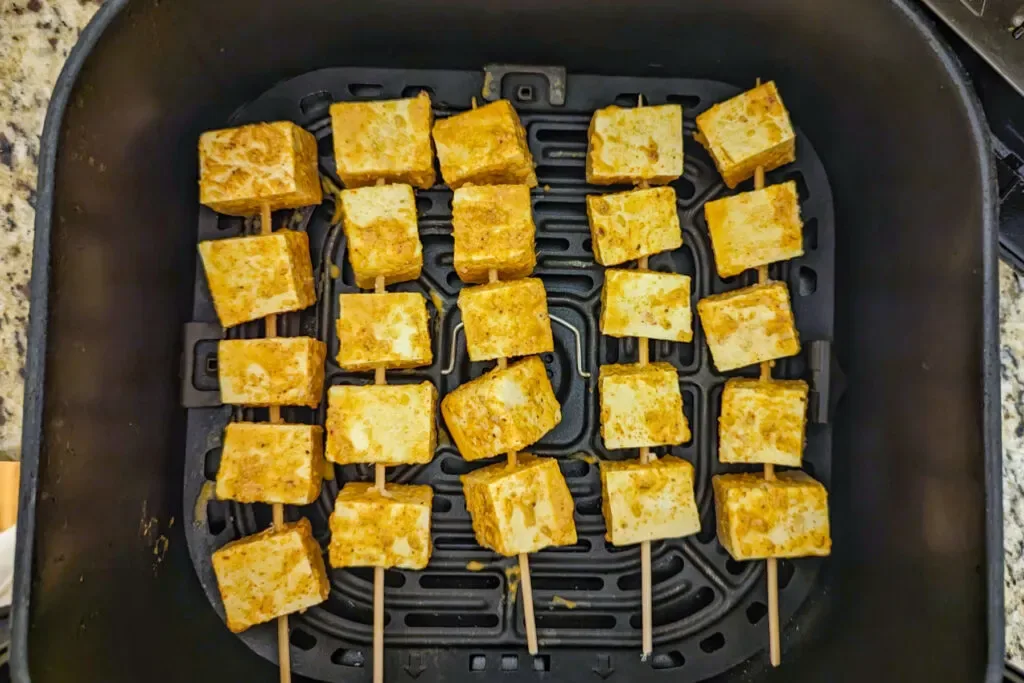
Image source: Bing (Web (fair-use with source credit))
â±ï¸ Chef Jessica’s Quick Recipe Snapshot
Air Fryer Verified
- Single Layer Only: Never stack or overlap in the basket; circulating high-velocity air creates the crisp barrier.
- Oil Sprayer Tip: Lightly mist with high smoke-point avocado or light olive oil (never use commercial aerosol sprays with propellants).
- Halfway Shake / Flip: Flip pieces halfway through the cycle to ensure uniform convection browning.
Why Your Air Fryer Paneer Looks Wrong (And How to Fix It)
Your paneer probably comes out pale, soggy, or burnt on top but raw inside. This isn’t bad luck. It’s physics.
Paneer contains roughly 50% moisture by weight. When heated rapidly, that water turns to steam. If trapped, it steams the cheese instead of frying it.
You see wet surfaces. No browning occurs. The Maillard reaction needs dry heat and direct contact with hot air.
Common culprits include overcrowding the basket and skipping the pre-dry step. Many users skip patting the paneer down. They assume the marinade does enough.
It doesn’t. Excess surface liquid creates a barrier. Hot air can’t touch the protein directly.
Instead, it heats the water layer first. This delays crisping significantly. You end up boiling your snack.
Another issue is temperature mismatch. Low temps (below 160°C/320°F) won’t evaporate moisture fast enough. High temps (above 200°C/400°F) burn sugars in marinades before the center cooks.
You get black spots on white cubes. Neither outcome is desirable. Visual consistency matters most here.
Uniform color means uniform doneness. Patchy brown patches signal uneven airflow or poor prep.
Fixing this starts before the air fryer turns on. Dry the paneer thoroughly. Use paper towels.
Press gently. Remove every drop of visible moisture. Then, ensure single-layer placement.
Leave gaps between cubes. Air must circulate around each piece. This allows steam to escape upward.
Without space, humidity builds up locally. Your crispy goal becomes impossible. Watch for the shift from dull to shiny.
That shine indicates oil adherence and proper heat exposure.
â±ï¸ Chef Jessica’s Quick Recipe Snapshot
Air Fryer Verified
- Single Layer Only: Never stack or overlap in the basket; circulating high-velocity air creates the crisp barrier.
- Oil Sprayer Tip: Lightly mist with high smoke-point avocado or light olive oil (never use commercial aerosol sprays with propellants).
- Halfway Shake / Flip: Flip pieces halfway through the cycle to ensure uniform convection browning.
Quick Answer
Air Fryer Paneer Recipes work best at 180°C (350°F). Cook for 8, 10 minutes. Pat paneer dry first.
Arrange in a single layer. Spray lightly with oil. Look for golden-brown edges.
Flip halfway through. Serve immediately for maximum crispness. Avoid overcrowding the basket.
â±ï¸ Chef Jessica’s Quick Recipe Snapshot
Air Fryer Verified
- Single Layer Only: Never stack or overlap in the basket; circulating high-velocity air creates the crisp barrier.
- Oil Sprayer Tip: Lightly mist with high smoke-point avocado or light olive oil (never use commercial aerosol sprays with propellants).
- Halfway Shake / Flip: Flip pieces halfway through the cycle to ensure uniform convection browning.
The Visual Checklist: Spotting Perfect Crispness vs. Soggy Failure
Knowing what "done" looks like saves your dinner. Text timers fail because appliances vary. Your eyes don’t.
Here’s how to judge readiness without opening the drawer constantly.
Signs of Success:
- Color Shift: Edges turn light golden brown. Centers remain creamy white. This contrast proves exterior crisping while preserving interior tenderness.
- Surface Sheen: A slight gloss appears. This shows oil has bonded with the surface. Matte finishes mean insufficient fat or low heat.
- Edge Definition: Cubes hold their shape sharply. Rounded corners suggest melting or excessive moisture loss. Sharp edges indicate structural integrity maintained by quick searing.
- Steam Release: Opening the basket reveals minimal fog. Heavy clouds mean trapped water still escaping. Ideal cooking lets vapor exit during the cycle.
Signs of Failure:
- Pale White: No browning occurred. Temperature was too low, or paneer was too wet. Result: Boiled texture.
- Dark Spots: Burnt marinade sugars. Heat spiked too high early on. Center likely remains cold.
- Shrunken Blocks: Overcooked. Protein tightened excessively. Texture becomes chewy and tough. Loss of volume signals moisture expulsion beyond ideal levels.
- Sliding Coating: Batter or spice mix falls off. Surface wasn’t dry enough before coating. Adhesion failed due to excess hydration.
Trust these visual markers over clock time. Every air fryer model differs slightly. Fan speed affects evaporation rates.
Learn your machine’s specific behavior. Take photos if needed. Compare them against future batches.
Consistency comes from observation, not guesswork.
â±ï¸ Chef Jessica’s Quick Recipe Snapshot
Air Fryer Verified
- Single Layer Only: Never stack or overlap in the basket; circulating high-velocity air creates the crisp barrier.
- Oil Sprayer Tip: Lightly mist with high smoke-point avocado or light olive oil (never use commercial aerosol sprays with propellants).
- Halfway Shake / Flip: Flip pieces halfway through the cycle to ensure uniform convection browning.
Step-by-Step: Achieving the Golden-Brown Tandoori Look
Follow this sequence for reliable results. Each step targets a specific visual outcome. Deviating risks texture issues.
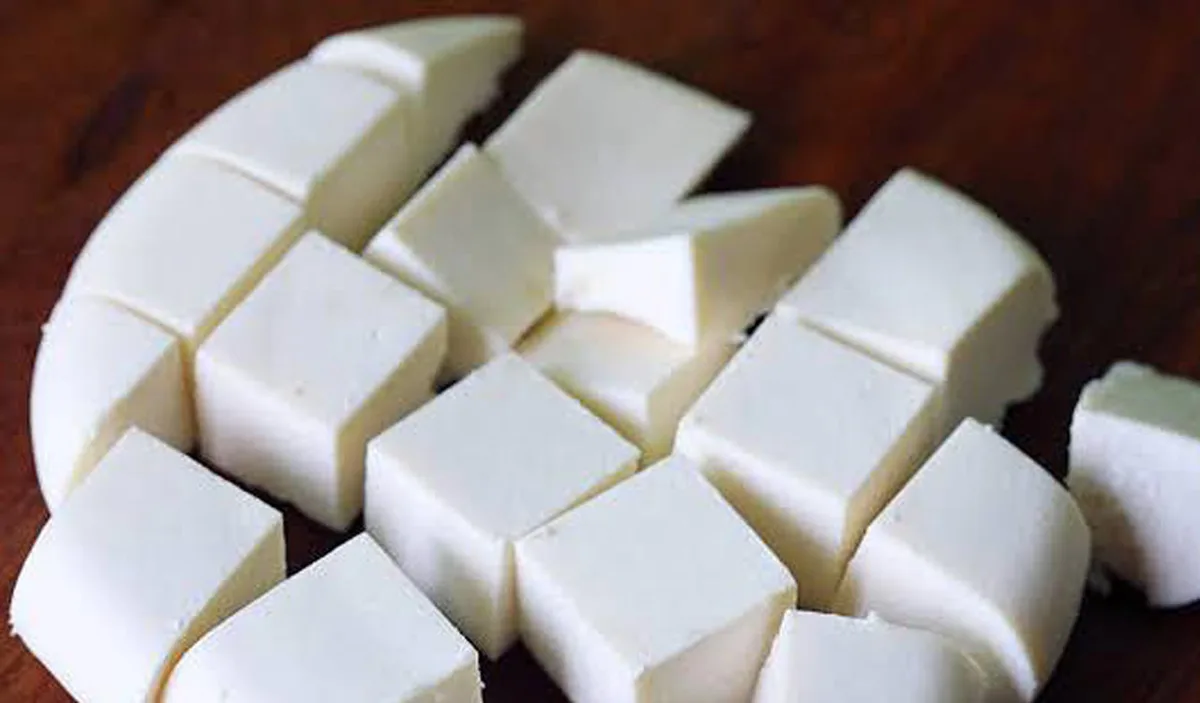
- Prep the Paneer: Cut into 1-inch cubes. Larger pieces cook unevenly. Smaller ones dry out too fast. Place on paper towels. Press firmly. Absorb surface moisture for two minutes. Repeat if necessary. Dryness ensures coating sticks.
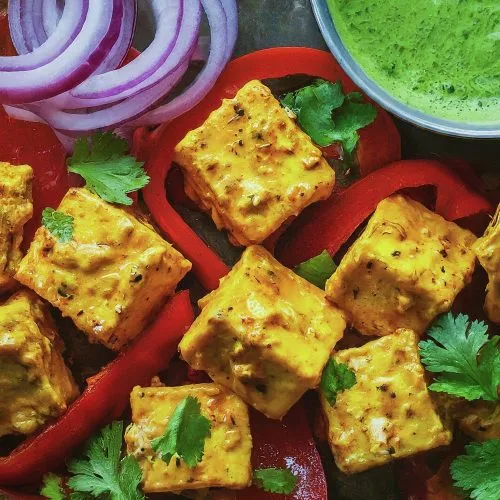
Mix Marinade: Combine yogurt, ginger-garlic paste, red chili powder, turmeric, salt, and kasuri methi. Whisk until smooth. Lumps create uneven coloring. Add one teaspoon of oil to the mix. This helps transfer heat evenly. Coat cubes gently. Don’t drown them. Thin coverage allows air access.
Preheat Appliance: Set air fryer to 180°C (350°F). Run empty for three minutes. Cold baskets cause sticking. Warm surfaces promote immediate searing. Check manual for specific preheat times. Some models require five minutes.
Load Basket: Arrange cubes in a single layer. Leave small gaps between pieces. Do not stack. Crowding traps steam. Steam prevents browning. Use silicone liners only if they have perforations. Solid liners block airflow underneath. Bottoms stay soggy.
Cook and Monitor: Insert basket. Cook for four minutes. Pull out. Shake gently. Flip cubes individually if possible. Return to heat. Cook another four to six minutes. Watch closely after minute eight. Colors deepen quickly. Stop when edges glow amber.
Rest Briefly: Remove paneer onto a wire rack. Paper plates trap residual steam. Racks allow circulation. Wait one minute. Crust sets slightly. Serving immediately preserves crunch. Delayed serving softens exterior.
This workflow prioritizes visual feedback loops. You adjust based on appearance, not just duration. Adjustments prevent common errors like burning or sogginess.
Practice makes perfect recognition faster.
â±ï¸ Chef Jessica’s Quick Recipe Snapshot
Air Fryer Verified
- Single Layer Only: Never stack or overlap in the basket; circulating high-velocity air creates the crisp barrier.
- Oil Sprayer Tip: Lightly mist with high smoke-point avocado or light olive oil (never use commercial aerosol sprays with propellants).
- Halfway Shake / Flip: Flip pieces halfway through the cycle to ensure uniform convection browning.
Troubleshooting Common Visual Mistakes and Texture Failures
Even with care, things go wrong. Identify the symptom to fix the root cause.
| Symptom | Likely Cause | Visual Indicator | Solution |
|---|---|---|---|
| Rubber-like Chew | Overcooking | Shrunken, darkened edges | Reduce time by 2 mins; lower temp to 170°C |
| Soggy Bottom | Trapped Steam | Wet sheen, no browning underneath | Use perforated liners; avoid stacking cubes |
| Burnt Top, Raw Inside | Uneven Heat | Black spots on upper faces | Lower rack position; flip more frequently |
| Pale Overall Color | Insufficient Fat/Moisture | Matte white surface everywhere | Increase oil spray; ensure thorough drying before marinating |
| Coating Falls Off | Poor Adhesion | Bare patches where spices slid away | Pat drier before dipping; thicken marinade slightly |
If your paneer tastes bland despite good looks, check seasoning distribution. Yogurt masks spices if applied too thickly. Scrape off excess marinade before loading.
Light coats flavor better than heavy sludges. Also, verify ingredient freshness. Old baking soda in besan mixes loses leavening power.
This affects crust formation. Fresh spices provide vibrant color cues. Turmeric should yield yellow-orange hues.
Red chili adds speckled depth. Missing colors often mean stale products.
Humidity plays a role too. In damp climates, paneer absorbs ambient moisture. Extend drying time before cooking.
Use a fan to accelerate surface evaporation. This extra step pays off in crispier results. Always prioritize dry inputs.
Water is the enemy of air frying. Manage it proactively. Observe changes closely.
Your eyes guide the final product quality effectively.
â±ï¸ Chef Jessica’s Quick Recipe Snapshot
Air Fryer Verified
- Single Layer Only: Never stack or overlap in the basket; circulating high-velocity air creates the crisp barrier.
- Oil Sprayer Tip: Lightly mist with high smoke-point avocado or light olive oil (never use commercial aerosol sprays with propellants).
- Halfway Shake / Flip: Flip pieces halfway through the cycle to ensure uniform convection browning.
Temperature and Timing Guide for Different Paneer Cuts
Does cut size really change the cooking time? Yes, drastically. Small cubes cook faster but dry out quicker.
Large blocks stay moist inside but struggle to crisp up. You need to match your visual goal to the geometry of the cheese.
For 1-inch cubes, stick to 180°C (350°F) for 8, 10 minutes. This is the sweet spot for most Tandoori styles. The exterior browns before the interior turns rubbery.
Check at minute seven. If edges are pale, add two more minutes. If they’re dark, pull them now.
Residual heat continues cooking briefly.
Thinner slices, around 1/4-inch, behave differently. They crisp in just 5, 6 minutes at the same temperature. Watch closely after minute four.
These pieces go from golden to burnt in seconds. High surface area means rapid moisture loss. You’ll see curling edges as a warning sign.
Remove immediately when flatness disappears.
Larger chunks, say 1.5 inches or bigger, need lower heat. Try 160°C (320°F) for 12, 15 minutes. High temps burn the outside while leaving the center cold.
Low-and-slow allows heat penetration without scorching. Look for uniform color across all faces. No black spots should appear.
The texture remains tender rather than crunchy. This method suits skewers best. Metal rods conduct heat into the core.
Ensure gaps between cubes on the rod. Airflow must reach every side. Stacked layers create steam pockets.
Those pockets prevent browning entirely. Keep it single-layer always. Visual consistency proves even cooking.
Trust your eyes over any timer app.
â±ï¸ Chef Jessica’s Quick Recipe Snapshot
Air Fryer Verified
- Single Layer Only: Never stack or overlap in the basket; circulating high-velocity air creates the crisp barrier.
- Oil Sprayer Tip: Lightly mist with high smoke-point avocado or light olive oil (never use commercial aerosol sprays with propellants).
- Halfway Shake / Flip: Flip pieces halfway through the cycle to ensure uniform convection browning.
Essential Tools That Change the Final Appearance
Can simple gear upgrades improve results? Absolutely. The right tools control airflow and adhesion.
Wrong ones trap steam or cause sticking. Your basket choice matters more than you think.
Perforated silicone liners are superior to solid paper. Solid papers block bottom airflow. Cubes sit in their own condensation.
They turn soggy underneath. Perforated versions let hot air circulate freely. You get 360-degree crisping.
The bottom face matches the top. Uniform golden brown emerges everywhere. Cleanliness improves too.
Grease drips through holes instead of pooling.
A fine-mist oil spray bottle beats pouring oil. Pouring creates uneven pools. Some cubes drown in fat.
Others remain dry and pale. Mist ensures micro-droplets cover every surface. This promotes consistent Maillard reactions.
The sheen looks professional, not greasy. Use avocado or light olive oil. Neutral flavors let spices shine.
Avoid butter sprays initially. Milk solids burn quickly at high heat. Add butter only after cooking if desired.
Wire cooling racks replace paper plates for resting. Paper traps residual steam against the crust. Softens the crunch within minutes.
Wire racks allow air movement below. Moisture escapes downward. The exterior stays rigid and crisp.
This holds true for up to ten minutes. Serve directly from the rack for best texture. Guests see the appealing structure intact.
Soggy piles look unappetizing. Presentation drives appetite. Good tools preserve both taste and sight.
Invest in these three items. They transform mediocre batches into restaurant-quality snacks. Visual appeal starts with proper equipment selection.
Don’t overlook the hardware. It shapes the final photo-worthy result.
🟠Chef Recommended: Oil Misters & Non-Stick Air Fryer Liners
Get maximum crunch with minimal oil while protecting your basket coating from sticky residue and propellant damage:
- Refillable Glass Oil Sprayer:Check Glass Oil Misters on Amazon →
- Reusable Silicone Air Fryer Liners:Check Reusable Silicone Liners on Amazon →
*FTC Disclosure: As an Amazon Associate, Air Fry Process earns from qualifying purchases.*
📖 Related Crispy Air Fryer Recipes:

Similar Posts