Crispy Air Fryer Fried Zucchini: Easy & Healthy Recipe
Most people fail at making crispy zucchini because they ignore the moisture. You toss slices in oil, hit start, and get soggy mush instead of a satisfying crunch. This isn’t a recipe problem.
It’s a physics problem involving steam and surface area.
Air fryer fried zucchini recipes rely on visual cues more than timers. As of 2026, modern units offer precise control, but your eyes are still the best tool. We’ll walk through exactly what to look for so you never serve limp vegetables again.
Let’s fix your technique.
â±ï¸ Chef Jessica’s Quick Recipe Snapshot
Air Fryer Verified
- Single Layer Only: Never stack or overlap in the basket; circulating high-velocity air creates the crisp barrier.
- Oil Sprayer Tip: Lightly mist with high smoke-point avocado or light olive oil (never use commercial aerosol sprays with propellants).
- Halfway Shake / Flip: Flip pieces halfway through the cycle to ensure uniform convection browning.
Why Your Air Fryer Zucchini Turns Out Soggy (And How to Fix It Visually)
Zucchini is roughly 95% water. When heated rapidly, that internal moisture turns to steam. If it can’t escape quickly, it condenses on the surface.
This creates a barrier that prevents browning. The result is pale, soft, and disappointing.
You need to manage two things: surface dryness and airflow. A wet slice will never crisp, no matter how hot the air gets. Similarly, if slices touch or overlap, steam gets trapped between them.
They essentially steam each other in place.
Visual confirmation is key here. Look for immediate evaporation after placing food in the basket. You should see slight shimmering, not pooling liquid.
By minute three, edges should begin to turn golden. If they stay white or gray, moisture is still dominant. Stop cooking.
Increase heat slightly or remove excess liquid manually. Trust your eyes over the clock.
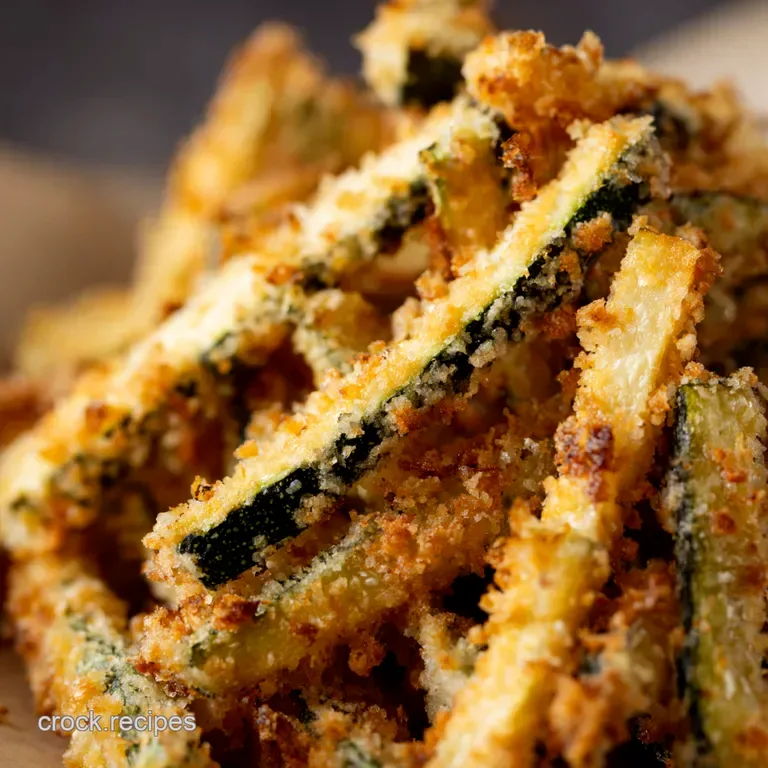
The Moisture Trap: Understanding Steam vs. Crispiness
Steam is the enemy of texture. Deep frying works because oil displaces water instantly. Air frying relies on convection.
Hot air moves across the surface, carrying away vapor. But this only happens if the surface is relatively dry to start with.
Think of it like drying clothes. Wet fabric stays cold until evaporation finishes. Same principle applies here.
Until surface moisture leaves, the temperature of the zucchini skin won’t rise enough for the Maillard reaction. That’s the chemical process responsible for brown color and complex flavor. No browning means no crunch.
Visual Benchmarks: What "Done" Actually Looks Like
Don’t guess. Use these specific indicators. First, check the color.
You want distinct golden-brown patches, not uniform tan. Uniformity often indicates steaming. Second, observe the structure.
Properly cooked spears stand upright when placed on a plate. Limp pieces flop over. Third, listen.
Tap the side gently. A crisp shell makes a hollow sound. Soft flesh sounds dull.
These sensory checks prevent overcooking, which leads to bitterness.
â±ï¸ Chef Jessica’s Quick Recipe Snapshot
Air Fryer Verified
- Single Layer Only: Never stack or overlap in the basket; circulating high-velocity air creates the crisp barrier.
- Oil Sprayer Tip: Lightly mist with high smoke-point avocado or light olive oil (never use commercial aerosol sprays with propellants).
- Halfway Shake / Flip: Flip pieces halfway through the cycle to ensure uniform convection browning.
Prep Work That Determines Success Before You Hit Start
Preparation matters more than cooking time. Most failures happen before the unit even powers on. You must address water content aggressively.
Skipping this step guarantees mediocrity. Treat prep as half the battle.
Start by selecting firm, young zucchinis. Older ones have spongy interiors and large seed cavities. Those hold too much water.
Slice uniformly. Inconsistent sizes mean some burn while others remain raw. Aim for 1/4-inch thickness for coins or batons.
Thicker cuts need longer times and risk sogginess. Thinner cuts dry out too fast. Find the middle ground.
Next, handle the salt. Salt draws water out via osmosis. Lay slices on paper towels.
Sprinkle lightly with kosher salt. Let them sit for ten minutes. You’ll see beads of moisture form.
Blot them thoroughly. Repeat if necessary. Dry surfaces accept coating better.
Wet surfaces repel oil and batter. This simple step transforms results.
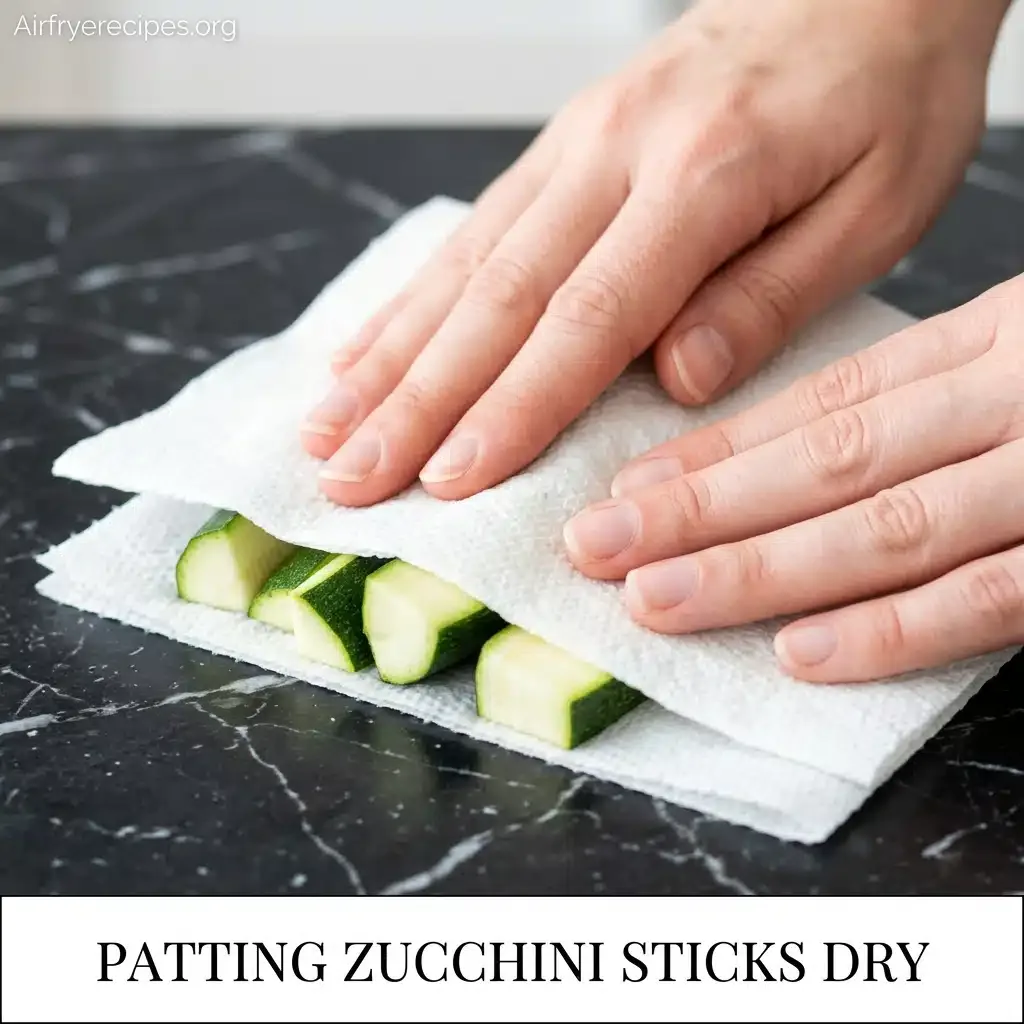
Salting and Drying: The Non-Negotiable First Step
Use coarse kosher salt. Table salt dissolves too quickly and can oversalt. Apply evenly but sparingly.
Too much salt ruins flavor. Ten minutes is usually sufficient for standard slices. For thicker cuts, extend to fifteen.
Check progress visually. If droplets appear, wipe them away immediately. Do not rinse.
Rinsing reintroduces water. Pat down with fresh paper towels until completely dry to the touch. Any remaining dampness will boil off during cooking, delaying crisping.
Cutting Geometry: Coins, Spears, or Rounds?
Shape dictates cook time. Coins (rounds) cook fastest but burn easiest. Spears (batons) offer structural integrity and even heating.
Half-moons provide surface area without excessive thickness. Choose based on your appliance power. Lower wattage units benefit from thinner cuts.
High-power models handle thicker pieces well. Always cut against the grain if possible. This shortens fibers, improving tenderness.
Uniformity is non-negotiable. Measure your first few slices. Match the rest.
Uneven cooking frustrates users and wastes food.
â±ï¸ Chef Jessica’s Quick Recipe Snapshot
Air Fryer Verified
- Single Layer Only: Never stack or overlap in the basket; circulating high-velocity air creates the crisp barrier.
- Oil Sprayer Tip: Lightly mist with high smoke-point avocado or light olive oil (never use commercial aerosol sprays with propellants).
- Halfway Shake / Flip: Flip pieces halfway through the cycle to ensure uniform convection browning.
The Coating Spectrum: Naked, Light Dust, or Full Bread
Not every zucchini needs batter. Sometimes less is more. The right coating depends on desired texture and dietary goals.
Understand the trade-offs before committing. Each method behaves differently under convective heat.
"Naked" refers to uncoated slices tossed in oil and spices. This yields roasted flavors and tender interiors. It’s quick and healthy.
However, it lacks crunch. Cornstarch dusting adds a subtle crisp layer. It absorbs residual moisture effectively.
This is the sweet spot for most home cooks. Traditional breading (flour/egg/breadcrumbs) mimics deep frying. It provides maximum crunch but requires careful monitoring.
Batter can drip and smoke if applied too thickly. Select based on patience and preference.
Option 1: The "Naked" Roast for Pure Flavor
Skip the starch entirely. Toss dried slices in avocado or olive oil. Season generously with garlic powder, paprika, and black pepper.
Arrange in a single layer. Cook at 375°F. This method highlights the vegetable’s natural taste.
It’s ideal for keto or gluten-free diets. Watch closely near the end. Without a buffer layer, sugars caramelize quickly.
Pull them when edges just begin to darken. They continue cooking slightly after removal. Serve immediately for best texture.
Option 2: Cornstarch Dust for Maximum Crunch
Cornstarch is superior to flour for air frying. It creates a lighter, crisper shell. Dip dried slices in egg wash or yogurt.
Roll in cornstarch. Shake off excess heavily. Clumps cause burning.
Spray lightly with oil before placing in basket. Cook at 400°F for faster crisping. The starch gelatinizes then dries hard.
This locks in shape and prevents sogginess. Aggregate reviews indicate this method offers the best balance of effort and reward. It survives reheating better than heavy batters.
Option 3: Traditional Breading for Comfort Food Texture
For true "fried" style, use panko breadcrumbs. Mix with parmesan and herbs. Double-dip: flour, egg, crumbs.
Press firmly to adhere. Ensure full coverage. Gaps lead to uneven cooking.
Spray tops with oil. This mimics deep-fried aesthetics. Be cautious with loose crumbs.
They fly around in high-speed fans. Clean your basket afterward to prevent smoking. This takes longer but delivers nostalgic satisfaction.
Best for parties or indulgent meals.
â±ï¸ Chef Jessica’s Quick Recipe Snapshot
Air Fryer Verified
- Single Layer Only: Never stack or overlap in the basket; circulating high-velocity air creates the crisp barrier.
- Oil Sprayer Tip: Lightly mist with high smoke-point avocado or light olive oil (never use commercial aerosol sprays with propellants).
- Halfway Shake / Flip: Flip pieces halfway through the cycle to ensure uniform convection browning.
Step-by-Step Execution: Managing Heat and Airflow
Cooking starts now. Precision matters. Temperature and spacing determine outcome.
Follow these steps strictly for consistent results. Deviations lead to failure.
Preheat your air fryer. Five minutes at target temp ensures immediate searing. Cold baskets steam food initially.
Load the basket carefully. Do not stack. Overlap blocks airflow.
Steam gets trapped underneath. Pieces touching will stick together. Separate them gently if needed.
Spray exposed surfaces with oil. Focus on tips and edges. These areas dry out first.
Oil protects them from burning. Close the drawer smoothly. Avoid shaking contents prematurely.
Set timer for half the expected duration. Check early. Adjust as needed.
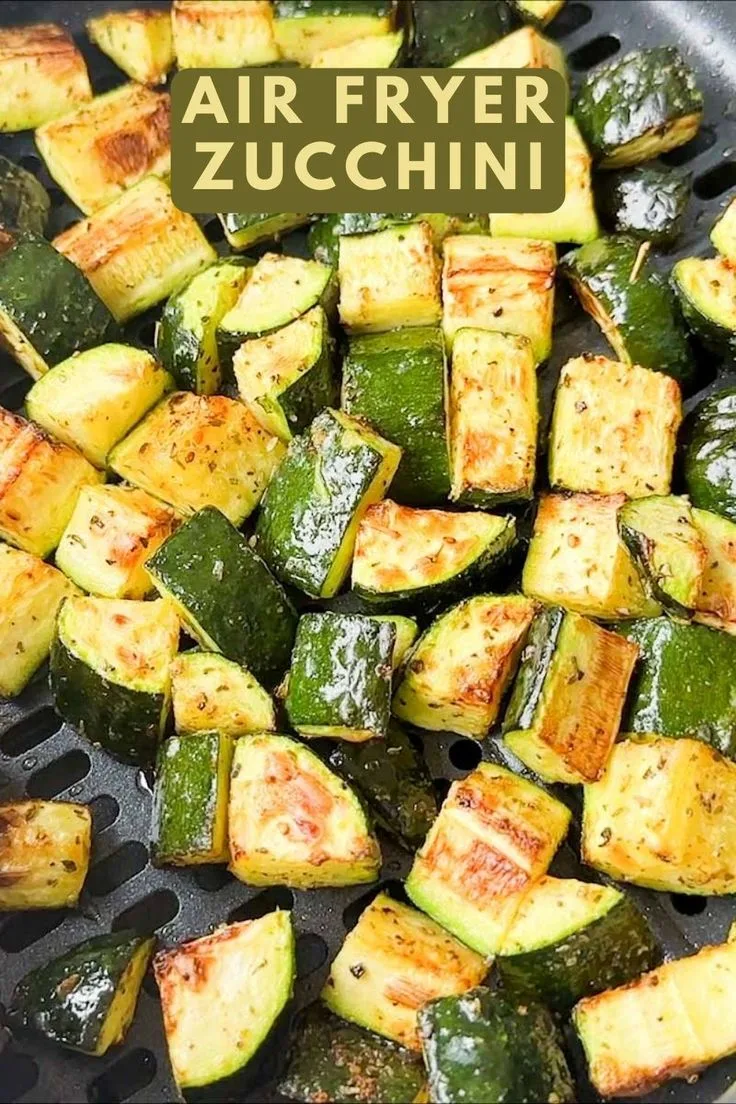
Temperature Strategy: 375°F vs. 400°F Decisions
Lower temps (375°F) suit thicker cuts or naked preparations. They allow interior heat penetration without exterior scorching. Higher temps (400°F+) work for thin slices or breaded items.
Rapid heat sets the crust quickly. This seals in moisture inside while drying outside. Manufacturer specifications suggest adjusting based on load size.
Larger batches may need lower temps to ensure even cooking. Smaller loads tolerate higher heat. Experiment within these ranges.
Note your unit’s quirks. Some run hotter than displayed. Use an oven thermometer if precision is critical.
Basket Loading Rules: Why Crowding Kills Crispiness
Space equals airflow. Fill no more than 50% of basket capacity. Leave gaps between pieces.
Air must circulate freely around each slice. Crowded baskets create microclimates. Humidity rises locally.
Food steams instead of fries. Cook in batches if necessary. Yes, it takes longer.
But quality suffers significantly otherwise. Keep cooked portions warm in a low oven (200°F). Do not cover tightly.
Trapped steam softens crusts. Spread them on a wire rack if available. This maintains texture until serving.
Mid-Cook Intervention: When to Shake and Flip
Agitation promotes even exposure. At the halfway mark, open the drawer. Shake vigorously.
Or flip individual pieces with tongs. This rotates surfaces facing the heating element. Top sides brown; bottom sides steam.
Flipping balances this. Check color progression. If one side is dark, reduce heat slightly.
Continue cooking for remaining time. Monitor final minutes closely. Zucchini transitions from perfect to burnt quickly.
Remove when golden brown appears on all visible faces. Don’t wait for exact timer expiry. Visual readiness trumps digital countdowns.
â±ï¸ Chef Jessica’s Quick Recipe Snapshot
Air Fryer Verified
- Single Layer Only: Never stack or overlap in the basket; circulating high-velocity air creates the crisp barrier.
- Oil Sprayer Tip: Lightly mist with high smoke-point avocado or light olive oil (never use commercial aerosol sprays with propellants).
- Halfway Shake / Flip: Flip pieces halfway through the cycle to ensure uniform convection browning.
Troubleshooting Common Visual Failures
Even with care, issues arise. Diagnose problems by appearance. Solutions depend on identifying the root cause.
Here’s how to read your food’s signals.
Pale and limp results indicate insufficient heat or excess moisture. Did you skip salting? Increase drying time next round.
Raise temperature by 25 degrees. Burnt edges with raw centers signal too high heat or thick cuts. Lower temp or slice thinner.
Sticking suggests inadequate oil or dirty basket. Clean thoroughly. Use parchment liners with holes for airflow.
Avoid solid foil traps. Smoke implies overheated oil or debris. Wipe residue regularly.
Check oil smoke points. Avocado oil handles high heat better than butter. Adjust accordingly.
Burnt Edges with Raw Centers
This mismatch confuses beginners. Thin edges char before thick middles cook. Solution: uniform cutting.
Another possibility: fan speed too high. Some models have adjustable settings. Reduce velocity if possible.
Alternatively, shield delicate parts with small foil tents. Create barriers against direct radiant heat. Rotate position mid-cook.
Move center pieces to corners. Corners often receive less intense flow. This equalizes exposure.
Patience pays off here. Rushing causes imbalance. Slow down slightly.
Accept longer cook times for perfection.
Pale, Limp Results Despite High Heat
High heat doesn’t guarantee crispness if moisture remains. Verify drying steps. Surface must feel bone-dry.
Also, check oil application. Too little oil fails to conduct heat efficiently. Too much pools and boils.
Aim for light misting. Even distribution matters more than volume. Consider switching coatings.
Flour holds water poorly. Cornstarch excels at absorption. Try that alternative.
Finally, assess batch size. Overloading overwhelms system capacity. Halve portion size.
Observe improvement. Immediate feedback helps refine technique.
â±ï¸ Chef Jessica’s Quick Recipe Snapshot
Air Fryer Verified
- Single Layer Only: Never stack or overlap in the basket; circulating high-velocity air creates the crisp barrier.
- Oil Sprayer Tip: Lightly mist with high smoke-point avocado or light olive oil (never use commercial aerosol sprays with propellants).
- Halfway Shake / Flip: Flip pieces halfway through the cycle to ensure uniform convection browning.
Serving Pairings and Storage for Leftovers
Zucchini’s mild flavor needs bold companions. Serve hot zucchini with cool, creamy dips to balance the heat and texture. Tzatziki works perfectly here.
The yogurt base cuts through any residual oiliness. Garlic adds punch without overpowering the vegetable. For a richer option, try a lemon-herb aioli.
It clings well to crispy surfaces. Avoid heavy marinara unless you’re making “naked” rounds. Sauce softens the crust quickly.
Dip individually rather than pouring over the batch. This preserves structural integrity on the plate.
Storage requires specific handling to avoid sogginess. Never seal hot zucchini in plastic wrap. Trapped steam turns crisp edges limp within minutes.
Let them cool completely on a wire rack first. Then transfer to an airtight container lined with paper towels. The towel absorbs excess moisture overnight.
Refrigerate for up to three days. Beyond that, texture degrades noticeably. Freezing is not recommended.
Ice crystals rupture cell walls, creating mush upon thawing. Plan to eat fresh or reheat properly.
Reheating Protocol: Restoring Crunch Without Microwaving
Microwaves fail at reheating fried vegetables. They excite water molecules, turning coatings rubbery. Use your air fryer instead.
Preheat to 350°F. Arrange leftovers in a single layer. Heat for two to three minutes.
Check frequently. You want warmth, not further cooking. This method revives the Maillard reaction slightly.
Edges regain their snap. If you lack an air fryer, use a conventional oven. Bake at 375°F for five minutes.
Skip the microwave entirely. Your taste buds will thank you. Freshness matters most, but proper reheating saves waste.
â±ï¸ Chef Jessica’s Quick Recipe Snapshot
Air Fryer Verified
- Single Layer Only: Never stack or overlap in the basket; circulating high-velocity air creates the crisp barrier.
- Oil Sprayer Tip: Lightly mist with high smoke-point avocado or light olive oil (never use commercial aerosol sprays with propellants).
- Halfway Shake / Flip: Flip pieces halfway through the cycle to ensure uniform convection browning.
Frequently Asked Questions
Can I use frozen zucchini slices?
No. Frozen zucchini releases excessive water upon thawing. This prevents crisping regardless of technique.
The cellular structure breaks down during freezing. Resulting mush cannot hold a coating. Always use fresh produce.
If you must use frozen, thaw completely first. Squeeze out every drop of liquid via cheesecloth. Even then, expect inferior texture.
Fresh is significantly better for this recipe. Don’t compromise quality for convenience here.
Why does my breading fall off?
Insufficient drying before coating causes detachment. Moisture acts as a barrier between zucchini and flour. Ensure surface is bone-dry after salting.
Press coating firmly into the flesh. Egg wash helps adhesion if using breadcrumbs. Avoid shaking the basket too vigorously early on.
Wait until the crust sets (about four minutes). Gentle handling preserves the layer. Thick, uneven coatings also shed easily.
Keep layers light and consistent. Adherence relies on dry contact points.
How do I prevent smoking in my air fryer?
Smoke usually comes from burning debris or excess oil. Clean the basket thoroughly before each use. Old grease accumulates and ignites at high temps.
Use high-smoke-point oils like avocado or refined olive oil. Avoid butter or unrefined varieties. Spray lightly; don’t drench.
Excess oil pools and burns. If smoke persists, lower temperature by 25°F. Check for loose crumbs trapped in heating elements.
Regular maintenance prevents most issues. Keep your unit clean for best results.
What is the best oil for air frying zucchini?
Avocado oil tops the list due to its high smoke point (520°F). It remains stable at typical cooking temps. Olive oil works well below 400°F.
Avoid coconut oil or butter for high-heat applications. They burn easily and impart bitter flavors. Neutral oils like canola are acceptable alternatives.
Flavor neutrality lets seasonings shine. Choose based on your preferred taste profile. Light misting ensures even coverage without pooling.
Quality oil enhances final texture significantly.
🟠Chef Recommended: Oil Misters & Non-Stick Air Fryer Liners
Get maximum crunch with minimal oil while protecting your basket coating from sticky residue and propellant damage:
- Refillable Glass Oil Sprayer:Check Glass Oil Misters on Amazon →
- Reusable Silicone Air Fryer Liners:Check Reusable Silicone Liners on Amazon →
*FTC Disclosure: As an Amazon Associate, Air Fry Process earns from qualifying purchases.*
📖 Related Crispy Air Fryer Recipes:

Similar Posts