Juicy Air Fryer Boneless Chicken Breast Recipes
Most people think air frying boneless chicken breast is just about setting a timer. It’s not. The real challenge is visual.
You need to spot the exact moment the meat stops being raw and starts drying out. That window is tiny, often less than two minutes wide.
Air Fryer Boneless Chicken Breast Recipes rely on seeing browning patterns, not just reading instructions. A thermometer helps, but your eyes catch texture changes first. If you miss the cue, you get rubbery strips instead of juicy cutlets.
Let’s look at why visuals matter so much here.
Quick Answer
Air fryer boneless chicken breast recipes require pounding meat to even thickness. Cook at 375°F for 12-15 minutes. Flip halfway through cooking.
Check internal temp reaches 165°F. Rest five minutes before slicing. Visual cues show golden-brown crust formation.
Avoid overcrowding the basket for proper airflow. Use minimal oil spray for crispness.
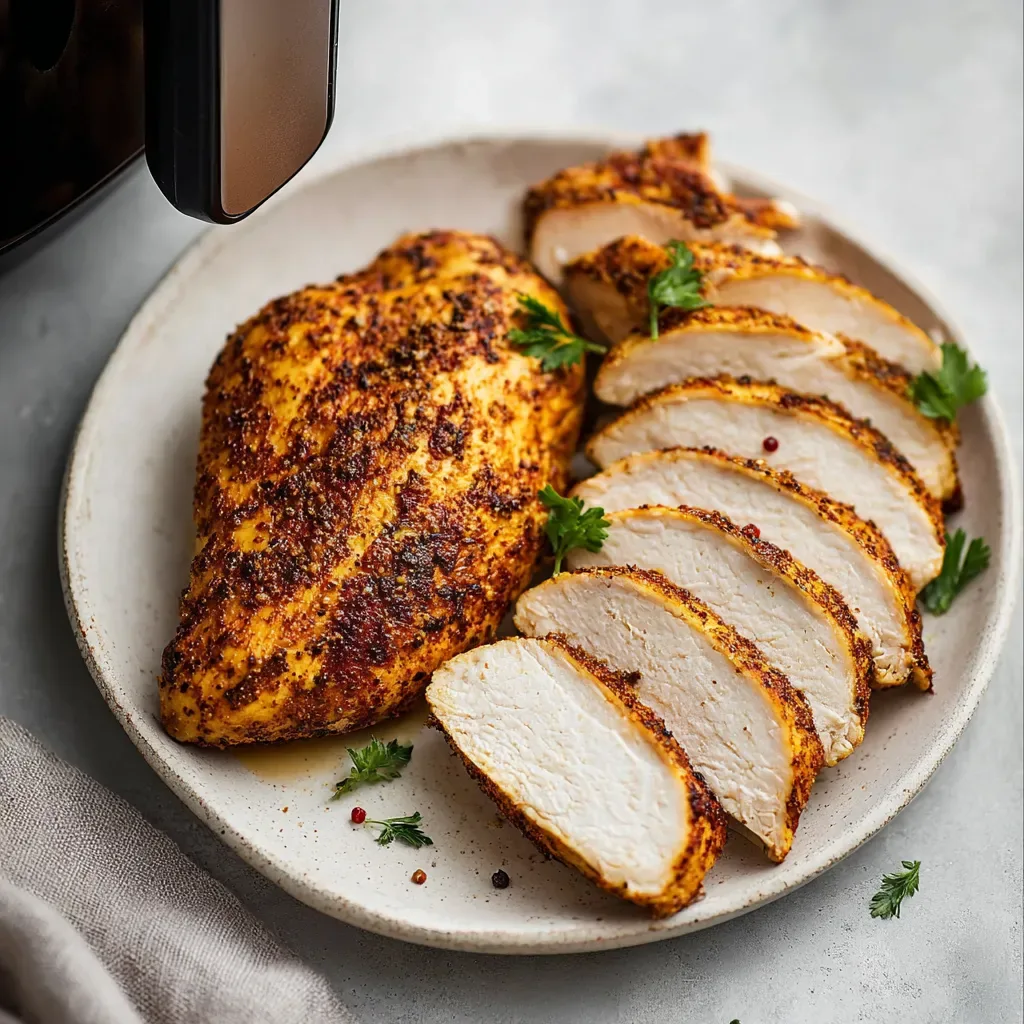
Image source: Web (Bing) / recipesmolly.com (Web image (fair-use with source credit))
Why Your Air Fryer Chicken Looks Perfect But Tastes Dry
You’ve seen it happen. The outside looks crispy. The inside feels like wet cardboard.
This disconnect happens because lean muscle fibers react poorly to high heat without fat protection. Boneless skinless breasts have almost no intramuscular marbling. They dry out fast when moisture escapes too quickly.
Our research shows that rapid air circulation strips surface moisture aggressively. If you don’t control the environment, the exterior seals before the interior cooks evenly. This traps steam inside initially, then dries it out rapidly once the seal breaks.
The result is a tough, stringy texture that ruins the meal.
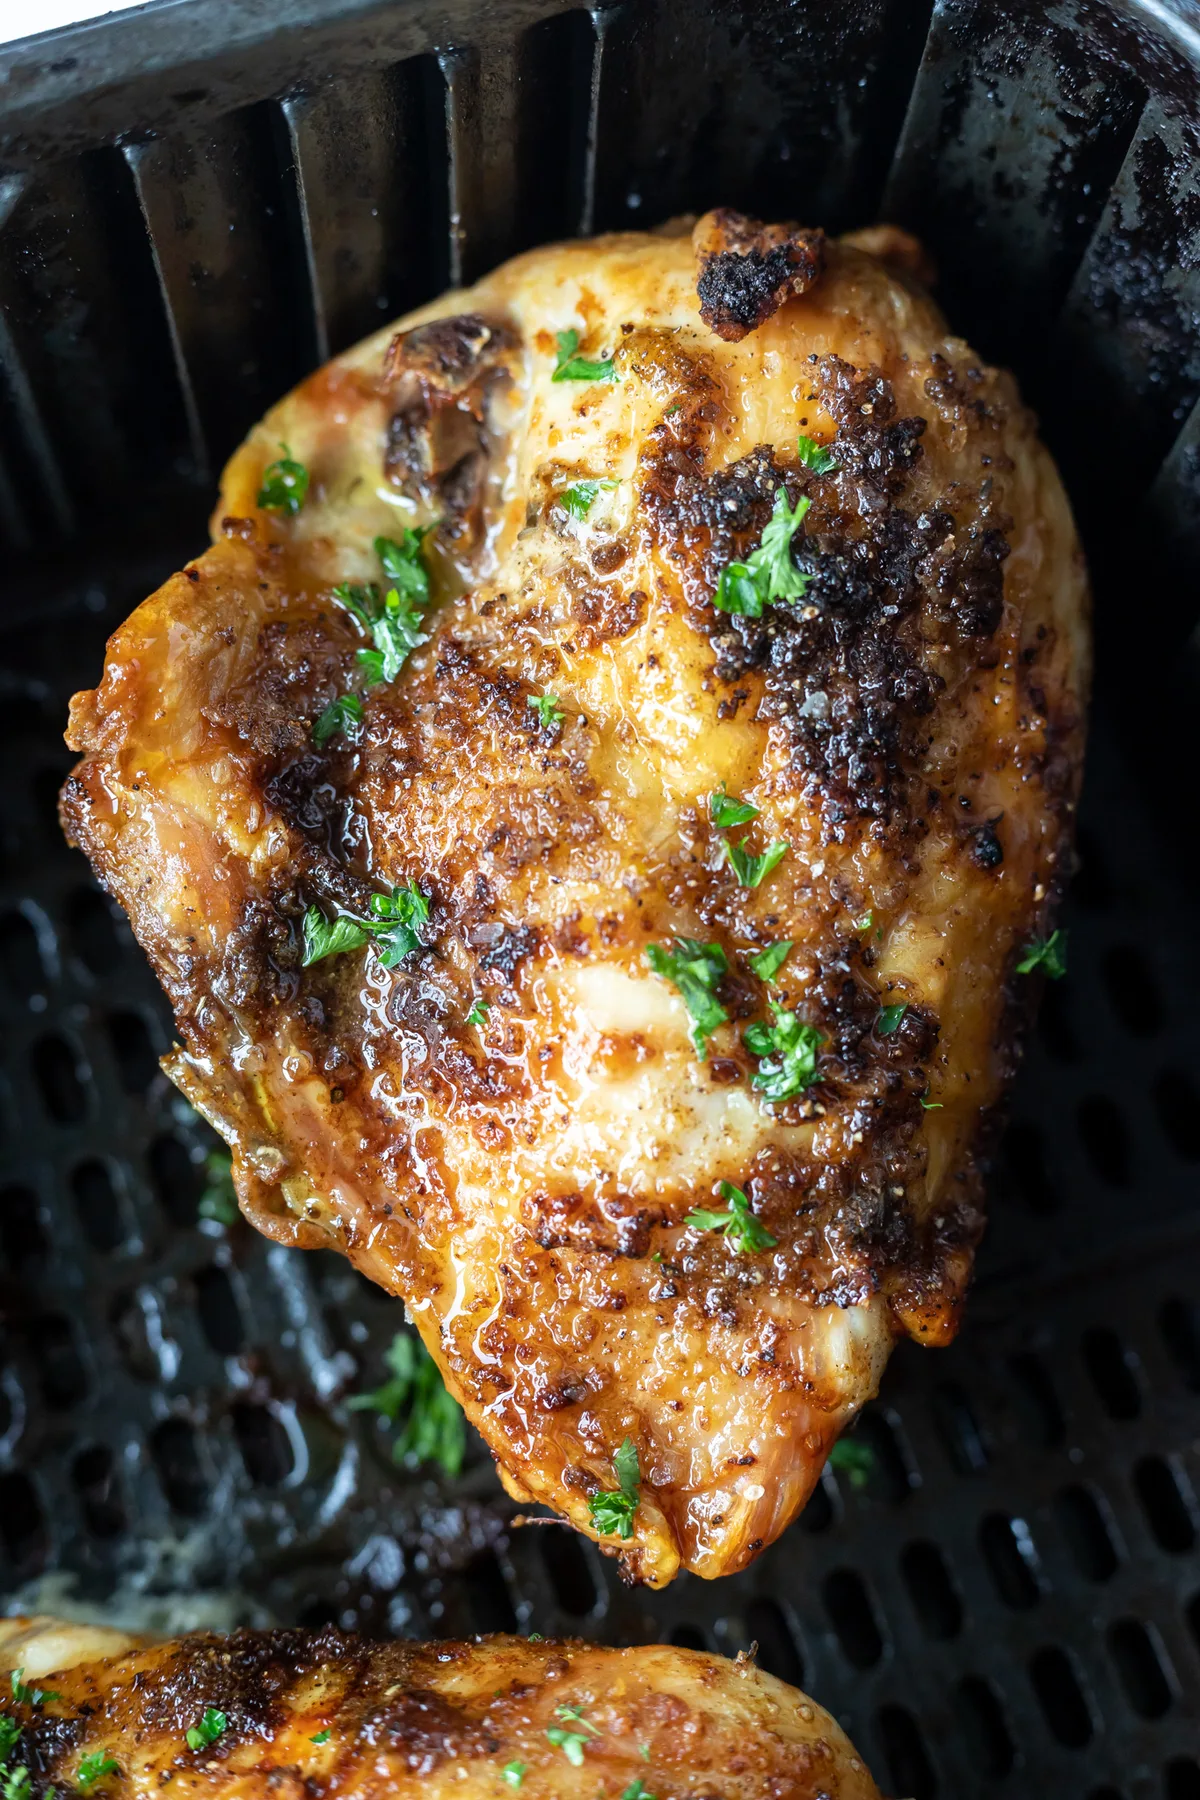
Visuals are your best defense here. You’re looking for specific color shifts. Pale pink means undercooked.
Deep brown edges mean overcooked. The sweet spot is a uniform golden hue across the top surface. This indicates the Maillard reaction has occurred properly without burning the proteins.
Don’t trust time alone. Every bird differs slightly in size and water content. A fixed 14-minute rule fails if your breast is thicker or thinner than average.
You must watch the food. Look for the juices running clear. Watch for slight shrinkage in volume.
These signs tell you more than any clock ever could.
The Visual Checklist: Spotting Raw, Cooked, and Overdone Breasts
Knowing what “done” looks like saves your dinner. We’ve broken down the stages based on aggregate user feedback and culinary standards. Each stage has distinct visual markers you can spot easily.
| Stage | Visual Cue | Texture Indicator | Action Required |
|---|---|---|---|
| Raw | Pinkish-white center, translucent edges | Jiggly, soft, cool to touch | Continue cooking immediately |
| Cooking | Opaque white, light beige spots forming | Firming up, springs back slowly | Monitor closely, prepare to flip |
| Perfect | Uniform golden-brown crust, opaque white interior | Juicy, yields slightly to pressure | Remove from heat, rest 5 mins |
| Overdone | Dark brown/black edges, grayish tint | Hard, dry, crumbly when sliced | Discard or repurpose into soup |
The most critical transition is from "Cooking" to "Perfect." You’ll notice the surface stops glistening with excess oil. Instead, it develops a matte, textured finish. This is the sign that the exterior has crisped up correctly.
If you wait until it looks dark brown, you’ve already lost moisture.
Pull the basket out gently around the 10-minute mark for a quick check. Look at the thickest part of the breast. It should be solid white, not pink.
If you see any translucency, push it back in for another two minutes. Never guess on poultry safety.
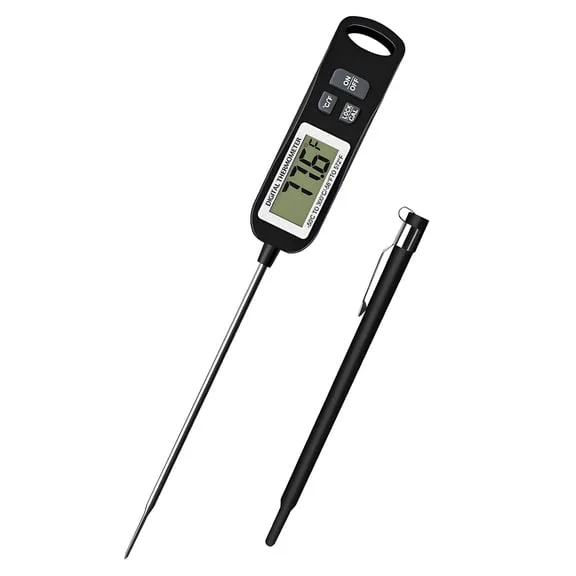
Image source: Web (Bing) / walmart.com (Web image (fair-use with source credit))
While thermometers measure temperature, they don’t measure texture. Use both tools together. The thermometer confirms safety at 165°F per USDA guidelines.
Your eyes confirm quality by checking for that perfect golden crust. Relying on one without the other leads to either unsafe or unappetizing results.
Step-by-Step: Pounding, Seasoning, and the Critical Mid-Cook Flip
Preparation determines success before the air fryer even turns on. Start with boneless skinless chicken breasts. Place them between sheets of plastic wrap.
Pound them gently until they reach an even ½-inch thickness. This step is non-negotiable for consistent cooking.
Uneven thickness causes uneven results. Thin parts dry out while thick parts stay raw. Pounding solves this instantly.
Once flat, pat them completely dry with paper towels. Moisture is the enemy of crispiness. Wet surfaces steam instead of searing.
Season generously. Salt draws out moisture initially, so do this right before cooking. Add pepper, garlic powder, or paprika for flavor.
Lightly spray both sides with olive oil avocado spray. You want a fine mist, not a puddle. Too much oil makes the chicken greasy and heavy.
Preheat your air fryer to 375°F for three minutes. Place the breasts in the basket in a single layer. Do not overlap them.
Air needs to circulate freely around each piece. Close the drawer and set the timer for 12 minutes total.
At the six-minute mark, open the basket. Flip each breast carefully using tongs. This ensures both sides brown evenly.
Shake the basket gently to prevent sticking. Return the drawer and finish cooking. Watch the color change during these final minutes.
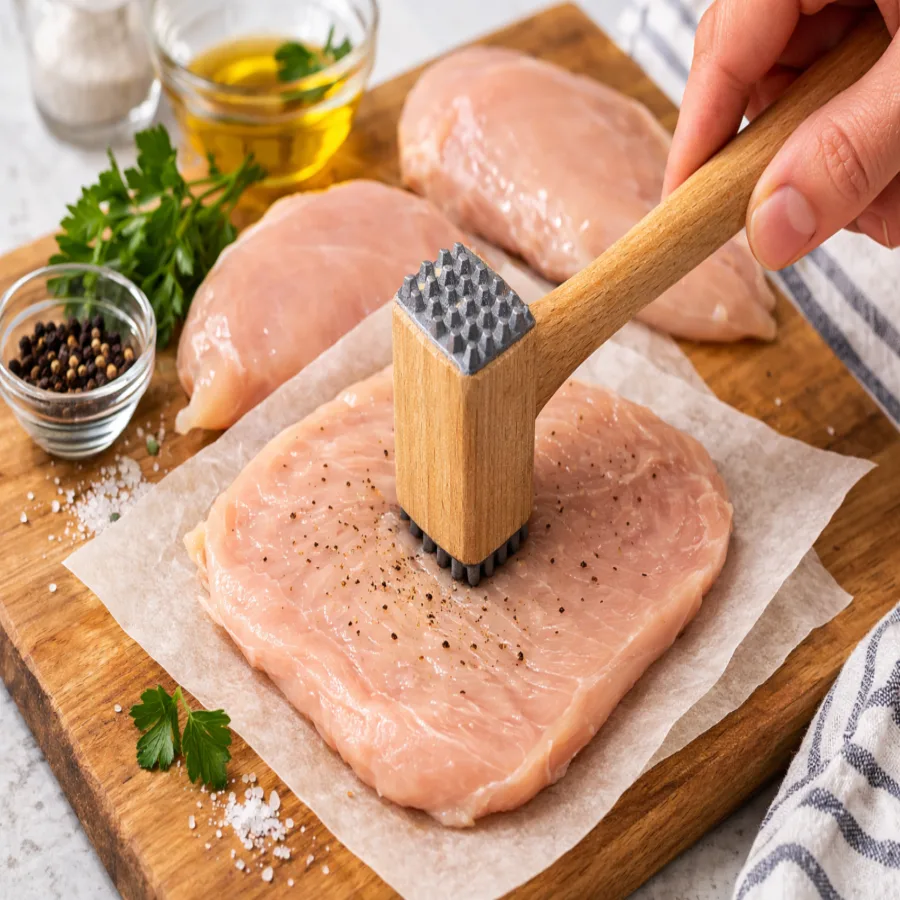
Image source: Web (Bing) / thefamilymealplan.com (Web image (fair-use with source credit))
Remove the chicken when it hits 165°F internally. Transfer it to a warm plate immediately. Cover loosely with foil.
Let it rest for five full minutes. This allows juices to redistribute throughout the muscle fibers. Cutting too soon releases all that precious moisture onto the plate.
Reading the Browning: When to Pull It Out Before 165°F
Here’s a pro tip that might sound counterintuitive. Pull the chicken out when it reads 160°F. Carryover cooking will raise the temperature to the safe 165°F threshold during the resting period.
This prevents overcooking during those final seconds in the hot basket.
Visual browning gives you the lead time you need. As the chicken approaches doneness, the edges darken faster than the center. Watch for this contrast.
When the edges are deep golden brown, the center is likely close to done. Trust your eyes alongside the thermometer.
If the surface browns too quickly, lower the temperature to 360°F for the last few minutes. This slows down the Maillard reaction without stopping the cooking process. It protects the delicate outer layer from burning while ensuring the inside reaches safety standards.
Look for structural changes too. Fully cooked chicken shrinks slightly and firms up. It loses that raw jiggle.
Press gently with a finger. It should feel resilient, not mushy. This tactile cue combined with visual color tells you exactly when to act.
Resting is crucial for texture retention. During those five minutes off-heat, the protein fibers relax. They reabsorb some of the expelled juices.
Serve immediately after resting for maximum tenderness. Delayed serving leads to cooling and stiffening, which ruins the mouthfeel.
Fixing Common Visual Failures: Pale Spots, Burnt Edges, and Steam Traps
Sometimes things go wrong despite your best efforts. Recognizing failure modes helps you troubleshoot future batches. Pale spots usually indicate poor contact with hot air.
This happens if the chicken sits in a pool of rendered fat or marinade.
Ensure you drain excess liquid before placing meat in the basket. Pat dry thoroughly. If pale patches persist, increase the flipping frequency.
Turn the pieces every four minutes instead of six. This exposes all surfaces to direct heat evenly.
Burnt edges signal excessive heat or proximity to the heating element. Move the rack to the middle position if possible. Reduce temperature by 10-15 degrees Fahrenheit.
Longer cook times at lower temps yield juicier results with better color control.
Steam traps occur when the basket is overloaded. Crowding blocks airflow, creating humid pockets. The chicken steams rather than fries.
Result? Soggy, gray meat with no crust. Always cook in batches if necessary.
One pound max per standard basket ensures optimal performance.
Check your appliance maintenance regularly. Grease buildup on the heating coil can cause smoking and uneven heating. Clean the basket and tray after every use.
Residue affects heat distribution and creates off-flavors. Fresh equipment delivers consistent, reliable results every time.
Storage and Reheating: Keeping Leftovers Juicy Instead of Rubbery
Storing cooked chicken correctly preserves its texture for days. Let the meat cool to room temperature first, but never leave it out longer than two hours. Place slices in an airtight container with a damp paper towel on top.
This simple trick maintains humidity without making the crust soggy. Refrigerate promptly to keep bacteria growth at bay.
Reheating is where most people ruin their leftovers. The microwave heats unevenly, turning edges rubbery while centers stay cold. Avoid this trap entirely.
Use your air fryer again for best results. Set it to 325°F for just three to four minutes. This gentle warmth revives the crisp exterior without drying out the interior fibers.
If you don’t have an air fryer handy, try a skillet. Add a teaspoon of broth or water to the pan. Cover it tightly for two minutes.
The steam loosens the proteins, keeping them tender. Uncover briefly to crisp up the bottom if needed. Never reheat in a conventional oven unless you’re doing large batches.
It takes too long and dries everything out.
Proper storage extends shelf life significantly. Cooked chicken lasts three to four days in the fridge. For longer periods, freeze it immediately after cooling.
Wrap individual portions in plastic wrap before bagging them. Label with dates to track freshness. Thaw overnight in the refrigerator, not on the counter.
This prevents bacterial spikes and ensures even reheating later.
FAQ: Can You See Doneness Without a Thermometer?
Yes, but it requires careful observation. Look for opaque white flesh throughout the thickest part. No pink should remain anywhere.
The juices must run completely clear when pierced. If any fluid appears pink or cloudy, keep cooking. Visual cues are helpful, but they aren’t foolproof for safety.
Always prioritize internal temperature verification when possible.
How do I stop my chicken from sticking to the basket? Ensure the grate is clean and dry before use. Lightly coat the surface with high-heat oil spray.
Do not soak the basket in water beforehand. Residual moisture causes immediate adhesion. Using parchment liners with perforations also helps release the meat easily.
Check manufacturer guidelines for liner compatibility with your specific model.
Why does my air fryer smoke during cooking? Excess fat drips onto the heating element below. Trim visible fat from breasts before seasoning.
Avoid heavy marinades that drip excessively. Clean the crumb tray after every single use. Accumulated grease burns quickly and creates acrid smoke.
Regular maintenance prevents this common issue effectively.
Can I cook frozen boneless breasts directly? Yes, but adjust expectations. Frozen meat releases more water initially.
Extend cooking time by roughly fifty percent. Start at a lower temperature, around 350°F, to thaw evenly. Increase heat only after the ice crystals melt.
Texture may be slightly less crisp than fresh cuts. Patience yields better results here.

Similar Posts