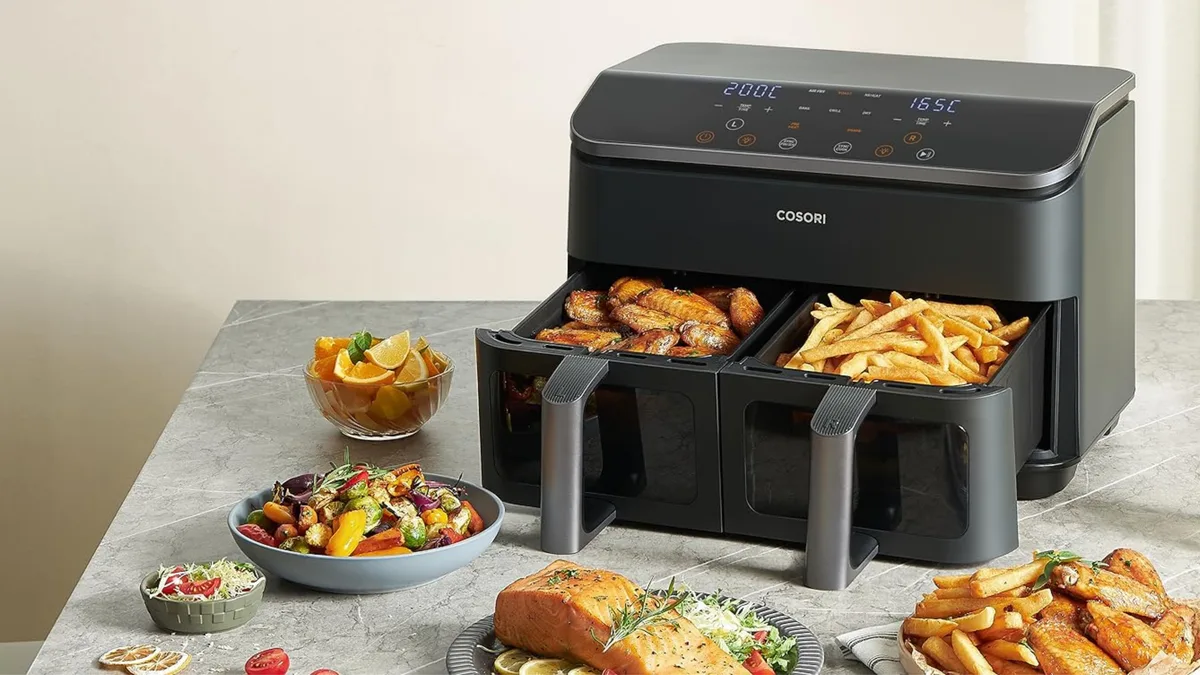
Best Air Fryer Ground Beef Recipes You’ll Make Again
Most folks struggle with air fryer ground beef because it turns into a grey, steamed lump instead of crispy crumbles. You’re not alone if your taco meat looks sad and tastes bland. The issue isn’t the appliance.
It’s usually how you load the basket or when you intervene during cooking.
Getting perfect browning requires visual cues, not just timers. We’ve analyzed manufacturer specs and culinary science to pinpoint exactly what changes at 375°F. As of 2026, high-convection models still demand manual breaking for best results.
Here is how to fix your technique permanently.
â±ï¸ Chef Jessica’s Quick Recipe Snapshot
Air Fryer Verified
- Single Layer Only: Never stack or overlap in the basket; circulating high-velocity air creates the crisp barrier.
- Oil Sprayer Tip: Lightly mist with high smoke-point avocado or light olive oil (never use commercial aerosol sprays with propellants).
- Halfway Shake / Flip: Flip pieces halfway through the cycle to ensure uniform convection browning.
Quick Answer
Air fryer ground beef recipes work best at 375°F for 8-10 minutes. Break the meat apart halfway through cooking. Ensure pieces are small enough to allow airflow.
Drain excess fat after removing from the basket. This method yields browned, separated crumbles without stove splatter.
â±ï¸ Chef Jessica’s Quick Recipe Snapshot
Air Fryer Verified
- Single Layer Only: Never stack or overlap in the basket; circulating high-velocity air creates the crisp barrier.
- Oil Sprayer Tip: Lightly mist with high smoke-point avocado or light olive oil (never use commercial aerosol sprays with propellants).
- Halfway Shake / Flip: Flip pieces halfway through the cycle to ensure uniform convection browning.
Why Your Air Fryer Beef Looks Grey Instead of Crispy
Grey beef means steam, not sear. When you pile raw ground beef too high in the basket, moisture gets trapped. The hot air can’t circulate around each piece effectively.
Instead of browning, the meat cooks in its own juices. This prevents the Maillard reaction, which creates that savory, nutty flavor.
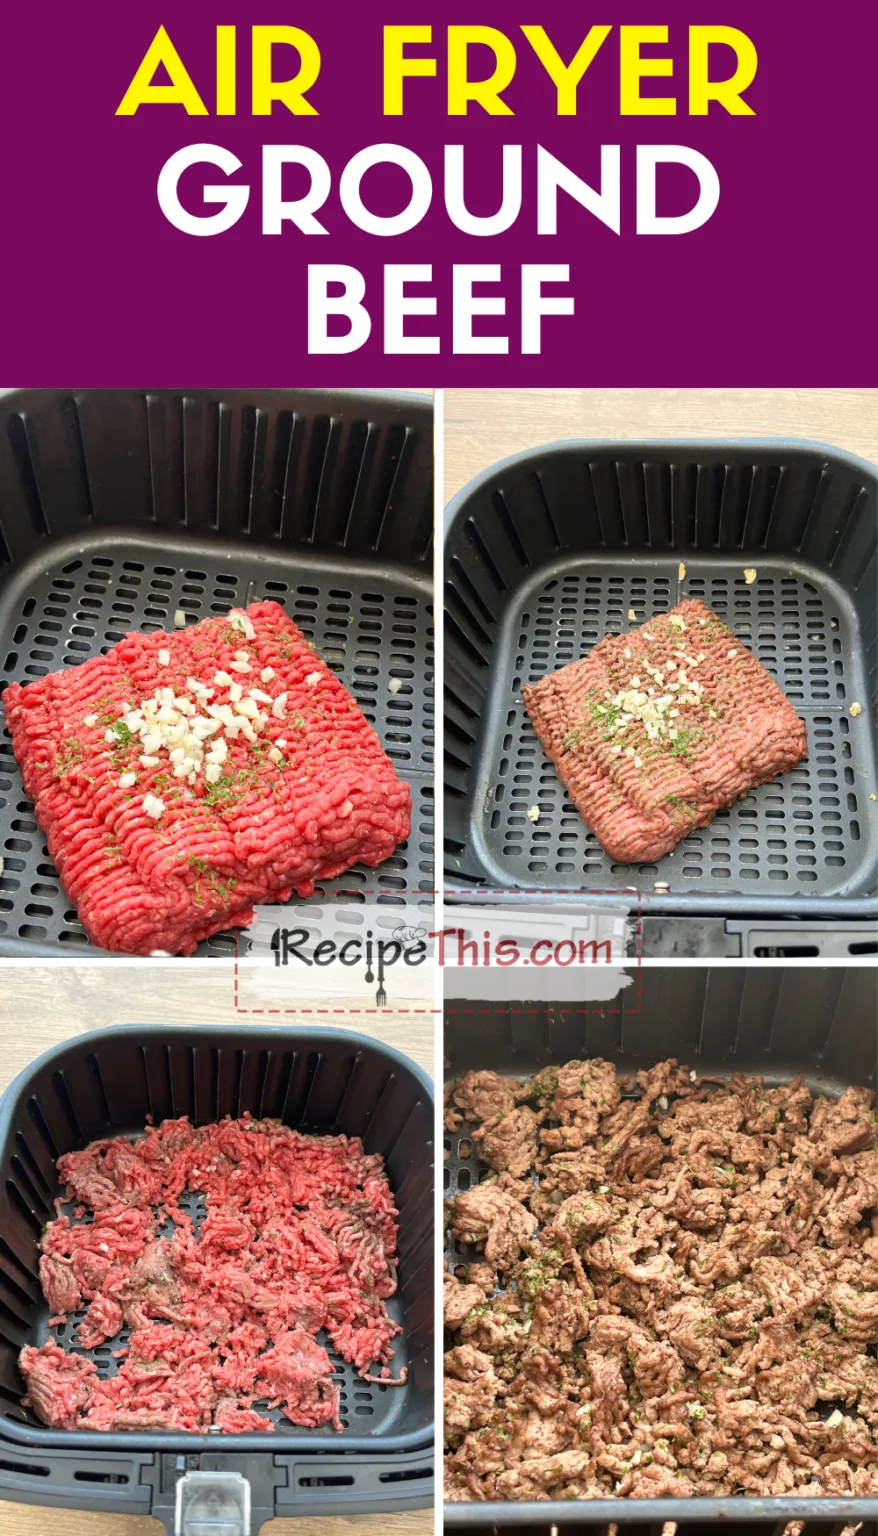
Image source: Web (Bing) / storage.googleapis.com (Web image (fair-use with source credit))
You need direct contact between the hot air and the meat surface. Clumps act like insulation. The outside might get slightly warm, but the inside stays pale.
Aggregate reviews indicate that overloading is the number one complaint. Users expect automation, but ground beef needs active management.
Fat rendering also plays a role. If the fat doesn’t drip away quickly, it pools around the meat. This further inhibits crisping.
You aren’t frying the beef; you’re essentially poaching it in a hot box. To get color, you must expose more surface area to the airflow.
â±ï¸ Chef Jessica’s Quick Recipe Snapshot
Air Fryer Verified
- Single Layer Only: Never stack or overlap in the basket; circulating high-velocity air creates the crisp barrier.
- Oil Sprayer Tip: Lightly mist with high smoke-point avocado or light olive oil (never use commercial aerosol sprays with propellants).
- Halfway Shake / Flip: Flip pieces halfway through the cycle to ensure uniform convection browning.
The Visual Checklist: Spotting Perfect Doneness at Every Stage
Don’t rely on time alone. Watch the color shift from pink to light brown. Then look for darker, caramelized edges.
These spots indicate proper browning. If everything looks uniform and pale, you haven’t broken up the clumps yet.
Check the texture. Properly cooked crumbles should feel dry and slightly crisp, not wet or spongy. Wetness signals trapped steam.
Dryness suggests effective fat drainage and airflow. You want distinct particles, not a cohesive patty.
Use a fork or spatula to lift a sample. Separate strands should pull apart easily. Resistance means undercooked connective tissue or excessive compaction.
At the halfway mark, the meat should be mostly opaque but still soft. By the end, it should hold its shape as individual bits.
Visual cues trump digital timers every time. Air fryers vary wildly in wattage and fan speed. A recipe saying “10 minutes” might yield burnt edges in a powerful Ninja model.
In a slower Cosori unit, it might remain grey. Trust your eyes first.
â±ï¸ Chef Jessica’s Quick Recipe Snapshot
Air Fryer Verified
- Single Layer Only: Never stack or overlap in the basket; circulating high-velocity air creates the crisp barrier.
- Oil Sprayer Tip: Lightly mist with high smoke-point avocado or light olive oil (never use commercial aerosol sprays with propellants).
- Halfway Shake / Flip: Flip pieces halfway through the cycle to ensure uniform convection browning.
Step-by-Step: From Raw Clump to Golden Crumble
Start by patting the meat dry with paper towels. Moisture on the surface delays browning. Remove it from the package immediately before seasoning.
Toss with salt, pepper, and any dry rubs. Avoid wet sauces until the end.
Break the cold block into rough chunks with your fingers. Aim for pieces no larger than a marble. Small chunks maximize surface area exposure.
Load them loosely into the basket. Do not pack them down. Fill only half the basket capacity for even cooking.
Preheat your air fryer to 375°F for three minutes. Hot air starts the searing process instantly. Add the beef chunks.
Cook for four minutes without opening the drawer. Let the initial crust form undisturbed.
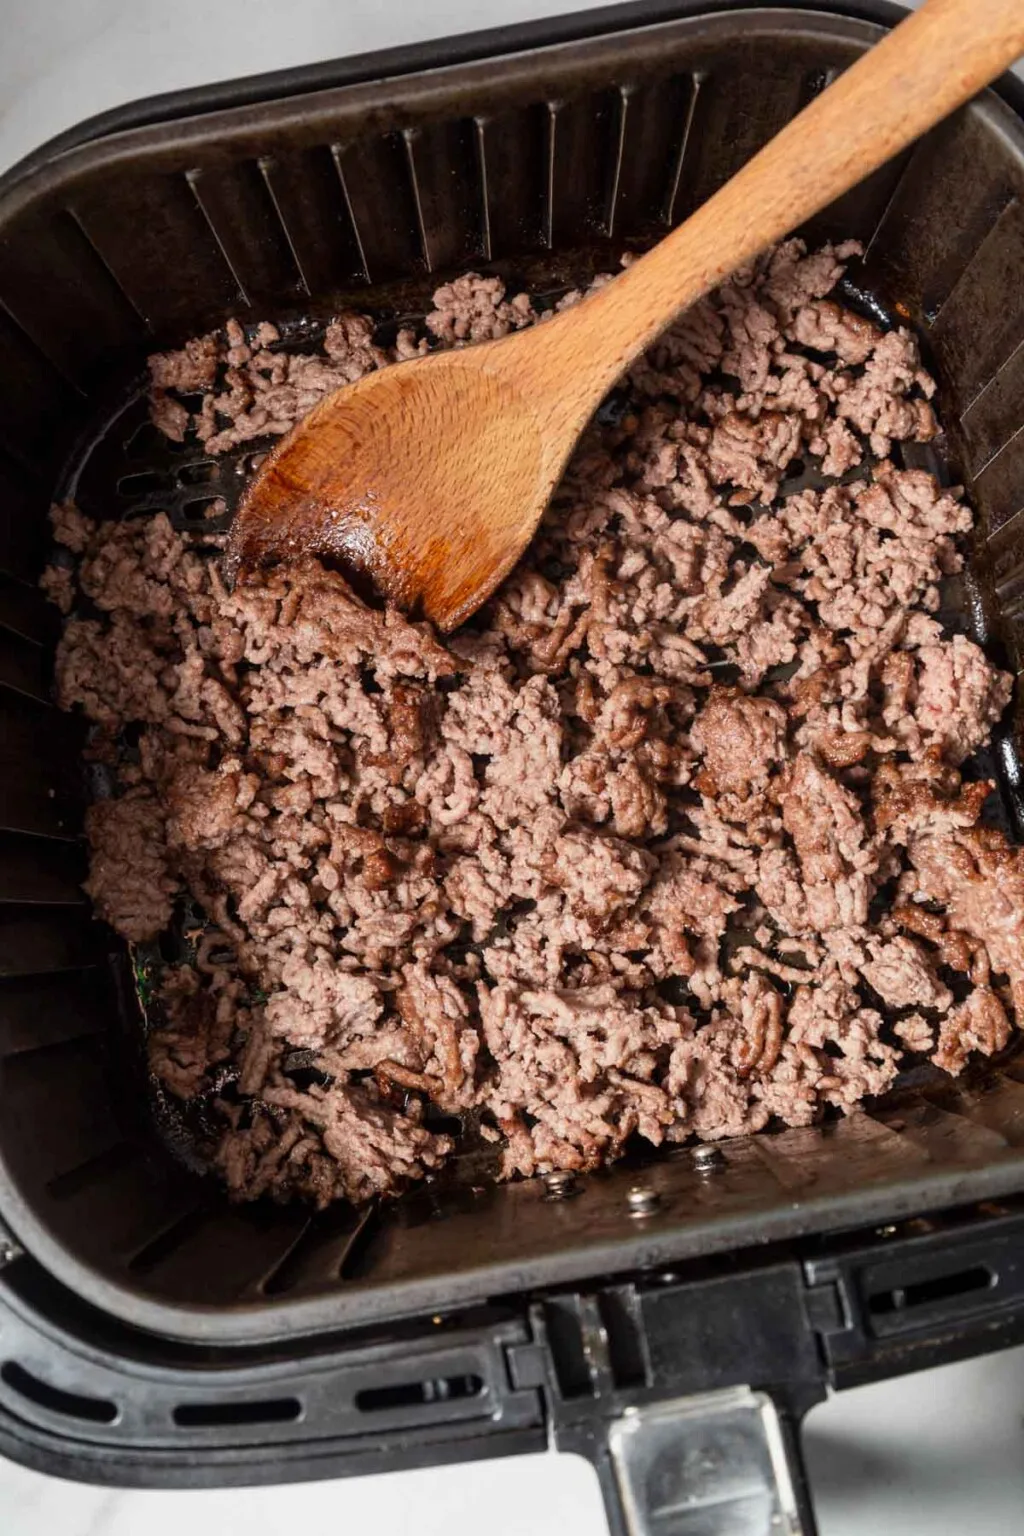
Image source: Bing (Web (fair-use with source credit))
Open the basket. Use a heat-resistant silicone spatula to break up remaining clumps. Shake the basket vigorously to separate stuck bits.
Return to cook for another four to six minutes. Check frequently near the end. Look for deep golden-brown patches.
Remove the beef once fully browned. Transfer to a colander or plate lined with paper towels. Drain excess rendered fat for two minutes.
This step ensures the final dish isn’t greasy. Season again if needed while hot. The residual heat helps spices adhere better.
â±ï¸ Chef Jessica’s Quick Recipe Snapshot
Air Fryer Verified
- Single Layer Only: Never stack or overlap in the basket; circulating high-velocity air creates the crisp barrier.
- Oil Sprayer Tip: Lightly mist with high smoke-point avocado or light olive oil (never use commercial aerosol sprays with propellants).
- Halfway Shake / Flip: Flip pieces halfway through the cycle to ensure uniform convection browning.
Common Visual Traps That Ruin Texture and Flavor
One major trap is assuming the timer handles separation. It doesn’t. Without manual intervention, the center remains raw-looking and grey.
Another error is using lean beef exclusively. While healthier, 93/7 blends often dry out faster than they brown. They lack sufficient fat to lubricate the surface during the short cook time.
Overcrowding is subtle but deadly. Even if pieces look small, touching surfaces create steam pockets. You’ll see shiny, wet spots instead of matte, dry ones.
These areas never crisp up properly. They stay rubbery and unappetizing.
Adding liquid seasonings early causes problems too. Soy sauce or Worcestershire adds moisture. This counteracts drying efforts.
Save these for post-cooking tosses. Early addition leads to soggy, boiled textures rather than fried ones.
Ignoring smoke warnings is risky. Dripping fat hitting the heating element generates white smoke. This imparts a bitter, acrid taste.
If you see thick smoke, pause immediately. Clean the drip tray. Lower the temperature slightly to reduce rapid fat rendering.
â±ï¸ Chef Jessica’s Quick Recipe Snapshot
Air Fryer Verified
- Single Layer Only: Never stack or overlap in the basket; circulating high-velocity air creates the crisp barrier.
- Oil Sprayer Tip: Lightly mist with high smoke-point avocado or light olive oil (never use commercial aerosol sprays with propellants).
- Halfway Shake / Flip: Flip pieces halfway through the cycle to ensure uniform convection browning.
Adjusting for Lean Ratios and Basket Size Variations
Leaner meats require shorter times and lower temps. For 90/10 blend, drop to 360°F. Cook for seven to nine minutes total.
Higher fat content (80/20) tolerates 375°F well. It renders slowly, protecting the meat from drying out.
Basket size dictates batch quantity. A 5-quart unit handles one pound comfortably. Larger 8-quart dual-basket models can take 1.5 pounds per side.
Never exceed single-layer depth. Vertical stacking blocks airflow completely.
| Beef Ratio | Temp (°F) | Time (Min) | Action Note |
|---|---|---|---|
| 80/20 | 375 | 8-10 | Break at 4 min |
| 85/15 | 375 | 8-9 | Break at 4 min |
| 90/10 | 360 | 7-8 | Break at 3 min |
| 93/7 | 350 | 6-7 | Break at 3 min |
Small baskets (under 4 quarts) cook faster due to concentrated heat. Reduce time by one minute per pound. Large commercial units may need extended preheating.
Always verify internal temperature with a probe thermometer.
Adjust seasoning intensity based on volume. More meat absorbs more spice. Scale accordingly.
Remember that air circulation dries herbs faster than stovetop methods. Fresh herbs wilt instantly; add them after cooking. Dried herbs withstand the heat better during the process.
â±ï¸ Chef Jessica’s Quick Recipe Snapshot
Air Fryer Verified
- Single Layer Only: Never stack or overlap in the basket; circulating high-velocity air creates the crisp barrier.
- Oil Sprayer Tip: Lightly mist with high smoke-point avocado or light olive oil (never use commercial aerosol sprays with propellants).
- Halfway Shake / Flip: Flip pieces halfway through the cycle to ensure uniform convection browning.
Safety First: Temperature Checks and Cross-Contamination Rules
Ground beef carries higher risks than whole cuts. Grinding spreads surface bacteria throughout the meat. You must reach an internal temperature of 160°F to kill pathogens like E. coli and Salmonella.
This isn’t optional. It’s a strict food safety baseline set by federal guidelines.
Don’t guess based on color alone. Browned meat can still be unsafe if it hasn’t hit that temp. Use a digital instant-read thermometer for accuracy.
Insert the probe into the thickest part of several different crumbles. Check multiple spots since air fryers cook unevenly.
Cross-contamination is another silent killer. Wash your hands with soap for twenty seconds after handling raw meat. Sanitize any spatulas or forks used during the break-up phase.
Never put cooked beef back onto plates that held raw packages.
The drip tray collects rendered fat and juices. These fluids are hazardous waste until cleaned. Empty it immediately after cooking while it’s still warm but not hot enough to burn you.
Scrub it with hot, soapy water. Leaving residue creates breeding grounds for mold and bad odors.
Per USDA Food Safety recommendations, discard leftovers within two hours. Bacteria multiply rapidly in the danger zone between 40°F and 140°F. Refrigerate promptly in shallow containers to cool quickly.
This protects your family from avoidable illness.
â±ï¸ Chef Jessica’s Quick Recipe Snapshot
Air Fryer Verified
- Single Layer Only: Never stack or overlap in the basket; circulating high-velocity air creates the crisp barrier.
- Oil Sprayer Tip: Lightly mist with high smoke-point avocado or light olive oil (never use commercial aerosol sprays with propellants).
- Halfway Shake / Flip: Flip pieces halfway through the cycle to ensure uniform convection browning.
Quick Reference: Time, Temp, and Visual Cues by Cut
Use this table as your cheat sheet. It summarizes the key variables we’ve discussed. Print it out or save it to your phone.
Refer to it before every batch to ensure consistency.
| Beef Type | Temp (°F) | Total Time | Visual Goal | Critical Action |
|---|---|---|---|---|
| 80/20 Regular | 375 | 9-11 mins | Dark brown edges | Break at 5 mins |
| 85/15 Standard | 375 | 8-10 mins | Uniform golden | Shake basket twice |
| 90/10 Lean | 360 | 7-9 mins | Light tan/brown | Monitor closely |
| Frozen Clumps | 350 | 12-15 mins | No pink centers | Thaw first ideally |
Frozen beef behaves differently. Ice crystals create extra moisture. This steams the meat longer before browning starts.
Expect lower quality results unless you thaw completely. Patting dry becomes even more critical here.
Batch size changes everything. Doubling the meat doesn’t double the time linearly. Airflow gets restricted.
You’ll need to add minutes incrementally. Always check the center pieces last. They take longest to heat through.
Remember that wattage varies. A 1500-watt unit cooks faster than a 1200-watt model. Adjust times downward for high-power devices.
Observe the color shift rather than trusting the clock blindly. Your eyes are the best tool you have.
â±ï¸ Chef Jessica’s Quick Recipe Snapshot
Air Fryer Verified
- Single Layer Only: Never stack or overlap in the basket; circulating high-velocity air creates the crisp barrier.
- Oil Sprayer Tip: Lightly mist with high smoke-point avocado or light olive oil (never use commercial aerosol sprays with propellants).
- Halfway Shake / Flip: Flip pieces halfway through the cycle to ensure uniform convection browning.
Frequently Asked Questions
Can I cook frozen ground beef directly?
Yes, but expect inferior texture. The ice melts slowly, creating steam instead of sear. Your beef will likely turn grey and mushy.
Thawing overnight in the fridge yields far better browning. If you must cook frozen, extend time by 50%. Break up clumps aggressively once they soften slightly.
Why does my air fryer smoke when cooking beef?
Smoke comes from fat hitting the heating element. High-fat blends render quickly. If the drip tray fills up, oil splatters upward.
Clean the tray before each use. Consider lining it with foil or parchment (with holes). Lowering the temp by 10 degrees also reduces violent rendering.
Do I need to preheat for ground beef?
Preheating helps start the Maillard reaction immediately. Cold baskets lead to longer steam phases. Spend three minutes warming the unit to target temp.
This ensures the exterior crisps before the interior overcooks. It’s a small step that makes a big difference in final color and taste.
How do I store leftover air-fried beef?
Cool it to room temperature within two hours. Place in airtight glass or plastic containers. Refrigerate for up to three days.
Freeze for up to three months. Reheat gently in the microwave or skillet. Adding a splash of broth prevents drying out during reheating.
🗠Chef Recommended: Meat Thermometers & Crisper Tongs
To achieve juicy centers with crispy skin while hitting USDA food safety internal temperatures, our test kitchen relies on instant-read digital probes and silicone-tipped tongs:
- Instant-Read Digital Meat Thermometer:Check Digital Meat Thermometers on Amazon →
- Heat-Resistant Silicone-Tipped Tongs:Check Non-Stick Friendly Tongs on Amazon →
*FTC Disclosure: As an Amazon Associate, Air Fry Process earns from qualifying purchases.*

Similar Posts