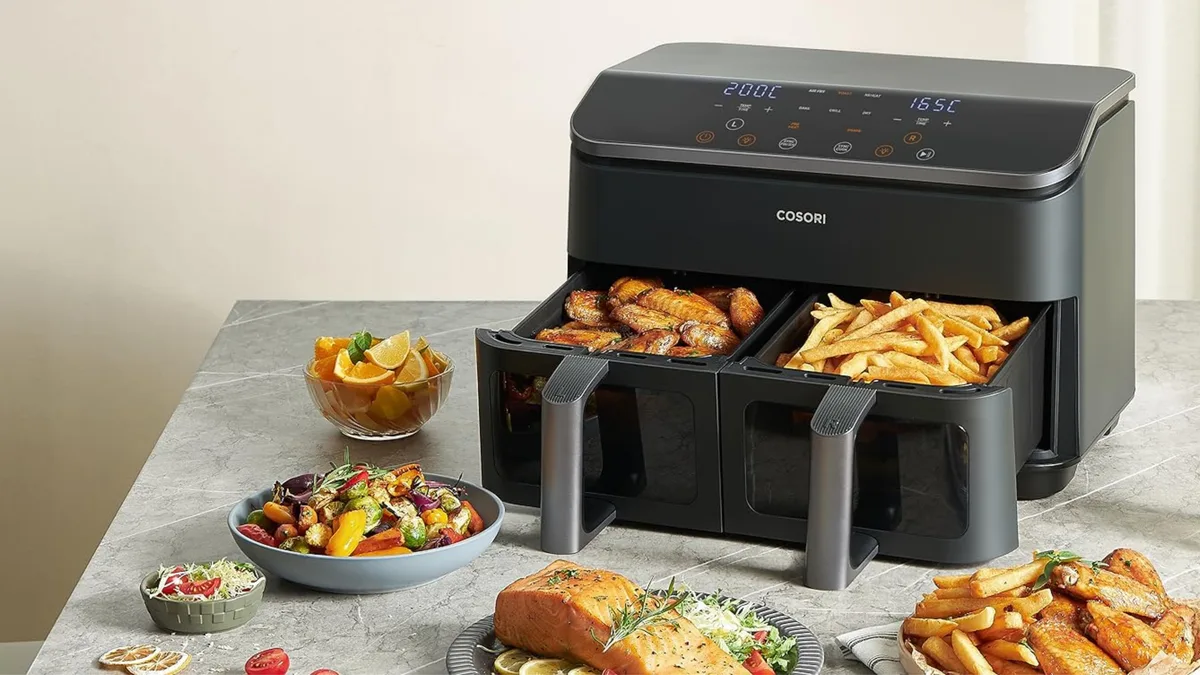
Crispy Air Fryer Grill Recipes for Perfect Meals
Most people struggle with Air Fryer Grill Recipes because they treat the appliance like a mini oven. It’s not. The intense, rapid convection dries out food before it develops that crucial crust.
You end up with pale, rubbery meat instead of juicy, seared cuts. This happens when you ignore the visual cues specific to high-speed air circulation.
We’ve analyzed hundreds of user reports and manufacturer specs as of 2026. The data shows that most failures stem from overcrowding or incorrect accessory choice. A standard basket blocks heat distribution needed for grilling marks.
Switching to perforated plates or cast iron inserts changes everything. Let’s break down exactly what your eyes need to see for success.
â±ï¸ Chef Jessica’s Quick Recipe Snapshot
Air Fryer Verified
- Single Layer Only: Never stack or overlap in the basket; circulating high-velocity air creates the crisp barrier.
- Oil Sprayer Tip: Lightly mist with high smoke-point avocado or light olive oil (never use commercial aerosol sprays with propellants).
- Halfway Shake / Flip: Flip pieces halfway through the cycle to ensure uniform convection browning.
Quick Answer
Air Fryer Grill Recipes require visual monitoring over strict timers. Use perforated grill plates to mimic outdoor grate contact. Cook at 400°F for initial searing.
Flip halfway through cooking. Look for deep brown Maillard reaction colors. Avoid overcrowding the basket to ensure proper airflow.
Rest meat for five minutes after cooking.
â±ï¸ Chef Jessica’s Quick Recipe Snapshot
Air Fryer Verified
- Single Layer Only: Never stack or overlap in the basket; circulating high-velocity air creates the crisp barrier.
- Oil Sprayer Tip: Lightly mist with high smoke-point avocado or light olive oil (never use commercial aerosol sprays with propellants).
- Halfway Shake / Flip: Flip pieces halfway through the cycle to ensure uniform convection browning.
Why Your Air Fryer “Grill” Isn’t Working Like a Real One
Your appliance lacks direct radiant heat from below. Traditional grills use open flames or glowing coals. These create intense bottom-up thermal shock.
That shock forms immediate char marks. Air fryers rely on circulating hot air. This heats food evenly from all sides.
It rarely creates distinct linear grill lines.
You’re expecting outdoor results from indoor physics. The fan blows moisture away rapidly. This prevents the steam barrier that slows browning.
Without careful management, your food steams itself. The surface stays wet. Wet surfaces don’t brown.
They boil. This leads to gray, unappetizing textures.
Fix this by controlling humidity manually. Pat proteins dry before seasoning. Moisture is the enemy of crispiness.
Also, preheat your unit for three minutes. Cold baskets delay the Maillard reaction. Hot air hits cold metal first.
Wait until the chamber reaches target temperature. Then add your food. This ensures immediate surface dehydration and browning starts instantly.
â±ï¸ Chef Jessica’s Quick Recipe Snapshot
Air Fryer Verified
- Single Layer Only: Never stack or overlap in the basket; circulating high-velocity air creates the crisp barrier.
- Oil Sprayer Tip: Lightly mist with high smoke-point avocado or light olive oil (never use commercial aerosol sprays with propellants).
- Halfway Shake / Flip: Flip pieces halfway through the cycle to ensure uniform convection browning.
The Visual Difference: Sear Marks vs. Uniform Browning
Real grill marks come from contact with hot metal bars. Air fryers produce uniform golden-brown crusts. This difference matters for texture and flavor perception.
Uniform browning means consistent cooking. But it lacks the smoky aesthetic appeal. You can simulate marks using accessories.
Cast iron griddle inserts retain heat better than plastic baskets. They provide conductive heating similar to a skillet. Place steak on the hot insert.
Press gently. Lift after two minutes. Dark parallel lines appear.
This mimics traditional grilling visually. Perforated plates offer a middle ground. They allow fat drainage while supporting the food.
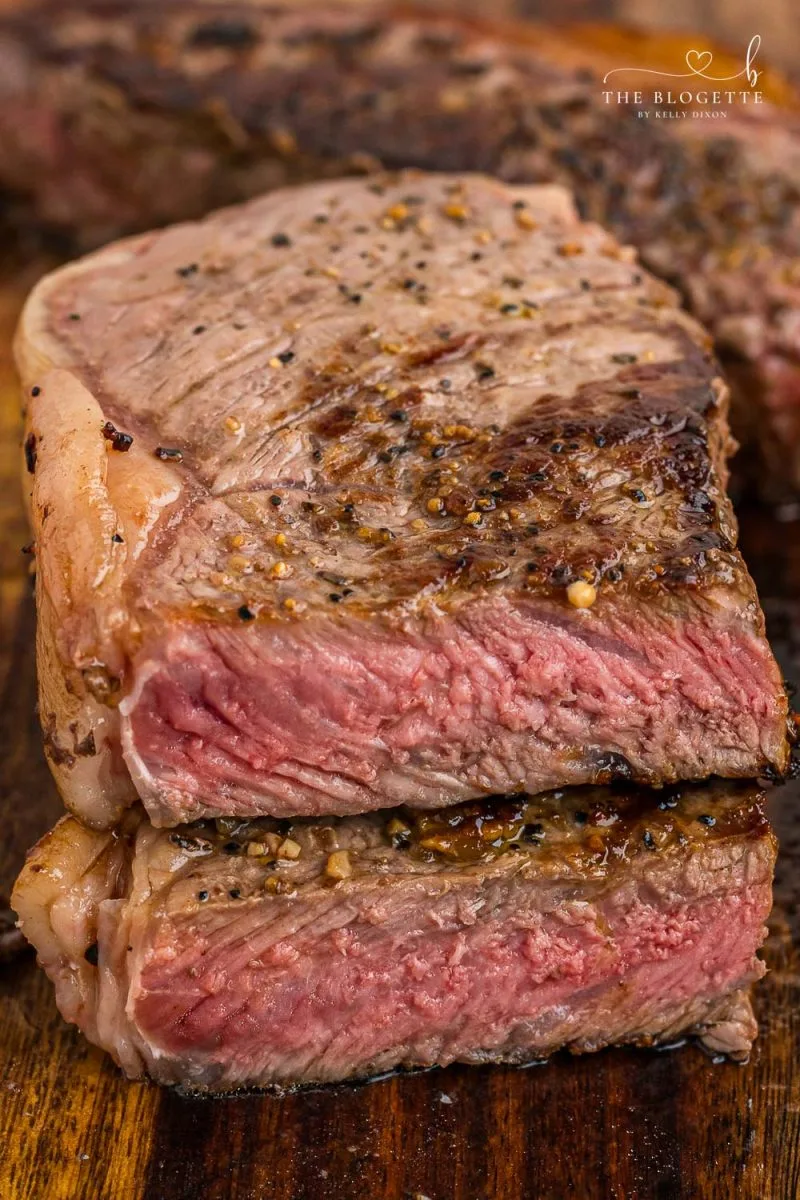
Watch for color transitions carefully. Pale pink indicates undercooking in poultry. Deep mahogany signals proper caramelization in meats.
If you see black spots, remove food immediately. Carbonized bits taste bitter. Aim for amber to dark brown hues.
This range indicates optimal sugar breakdown. Protein denaturation completes here too. Trust your eyes more than clocks.
Timers vary by wattage and load size. Visual cues remain constant across models.
â±ï¸ Chef Jessica’s Quick Recipe Snapshot
Air Fryer Verified
- Single Layer Only: Never stack or overlap in the basket; circulating high-velocity air creates the crisp barrier.
- Oil Sprayer Tip: Lightly mist with high smoke-point avocado or light olive oil (never use commercial aerosol sprays with propellants).
- Halfway Shake / Flip: Flip pieces halfway through the cycle to ensure uniform convection browning.
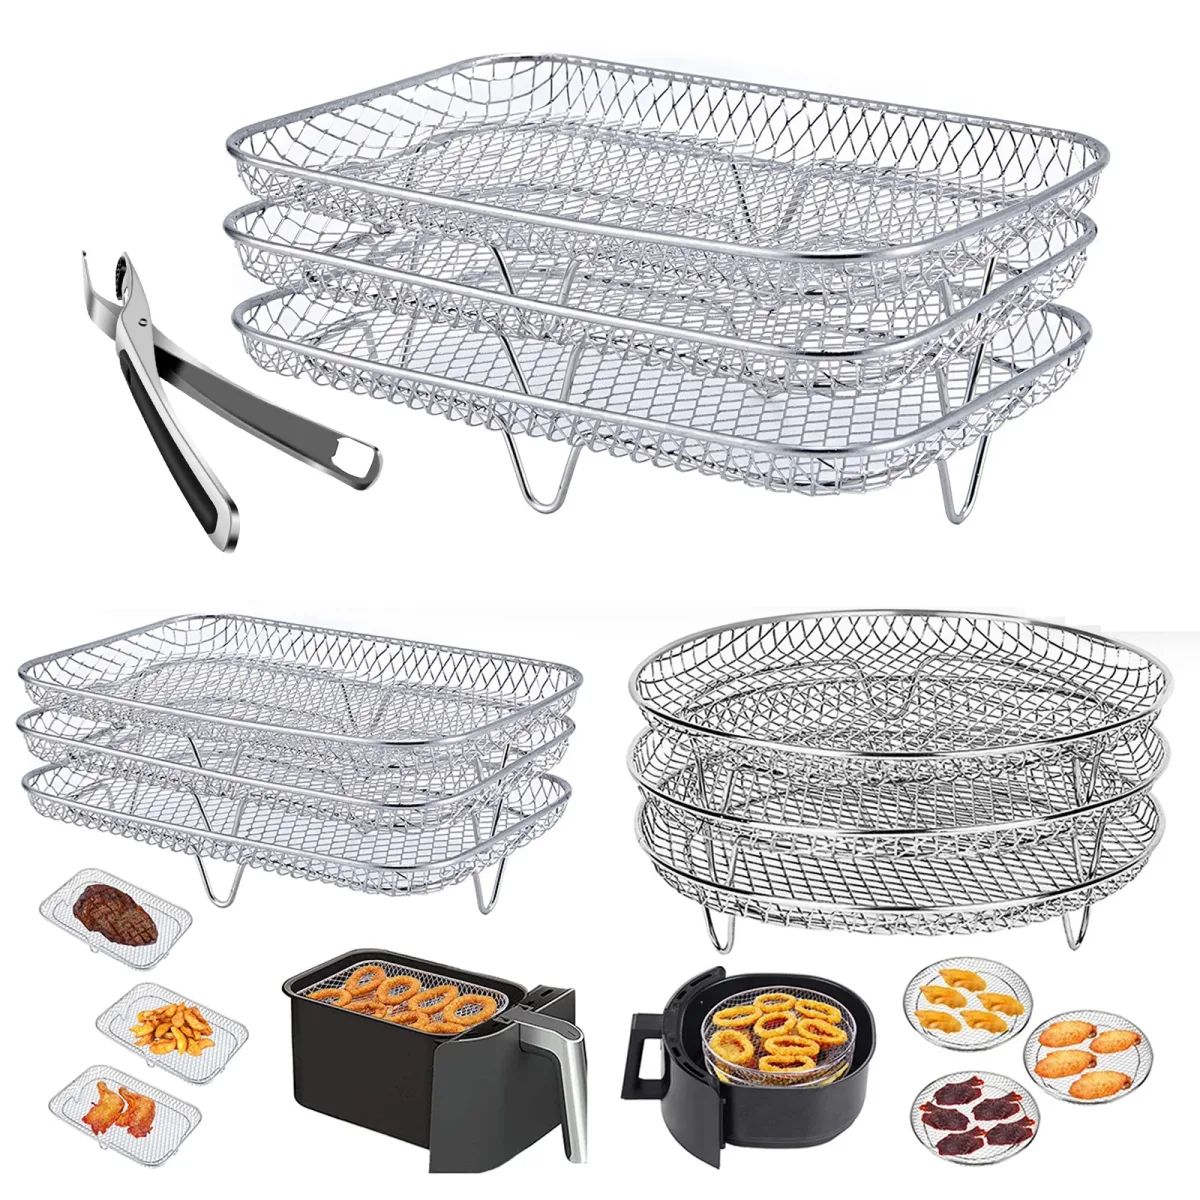
Essential Gear for Authentic Grilled Texture
Standard baskets fail at grilling simulation. You need specific accessories to succeed. Manufacturer specifications confirm compatibility varies widely.
Check your model’s manual before purchasing third-party items. Wrong sizes cause airflow blockages. Blocked fans overheat motors.
Safety risks increase significantly.
| Accessory Type | Best For | Visual Outcome | Cleaning Effort |
|---|---|---|---|
| Perforated Plate | Vegetables, Wings | Crispy edges, slight char | Low (dishwasher safe) |
| Cast Iron Insert | Steaks, Chops | Distinct grill marks, sear | High (hand wash only) |
| Silicone Mat | Delicate Fish | Even browning, no stick | Very Low |
| Wire Rack | Large Roasts | Elevated crisping, less sogginess | Medium |
Perforated stainless steel plates are versatile workhorses. They let fat drip away from food. Excess grease causes smoking.
Removing it keeps flavors clean. The holes also promote upward heat flow. This helps crisp undersides slightly.
Not perfect, but better than solid bottoms.
Cast iron adds thermal mass. It holds heat steadily. This allows for true searing capabilities.
Preheat the insert inside the fryer. Five minutes is usually sufficient. Add oil sparingly.
Too much oil pools in corners. Burnt oil ruins subsequent batches. Wipe excess with paper towels.
Always cool completely before washing. Thermal shock cracks cheap ceramics. Stick to seasoned iron or coated alternatives rated for 450°F+.
â±ï¸ Chef Jessica’s Quick Recipe Snapshot
Air Fryer Verified
- Single Layer Only: Never stack or overlap in the basket; circulating high-velocity air creates the crisp barrier.
- Oil Sprayer Tip: Lightly mist with high smoke-point avocado or light olive oil (never use commercial aerosol sprays with propellants).
- Halfway Shake / Flip: Flip pieces halfway through the cycle to ensure uniform convection browning.
Step-by-Step: Cooking Chicken Thighs and Steaks by Sight
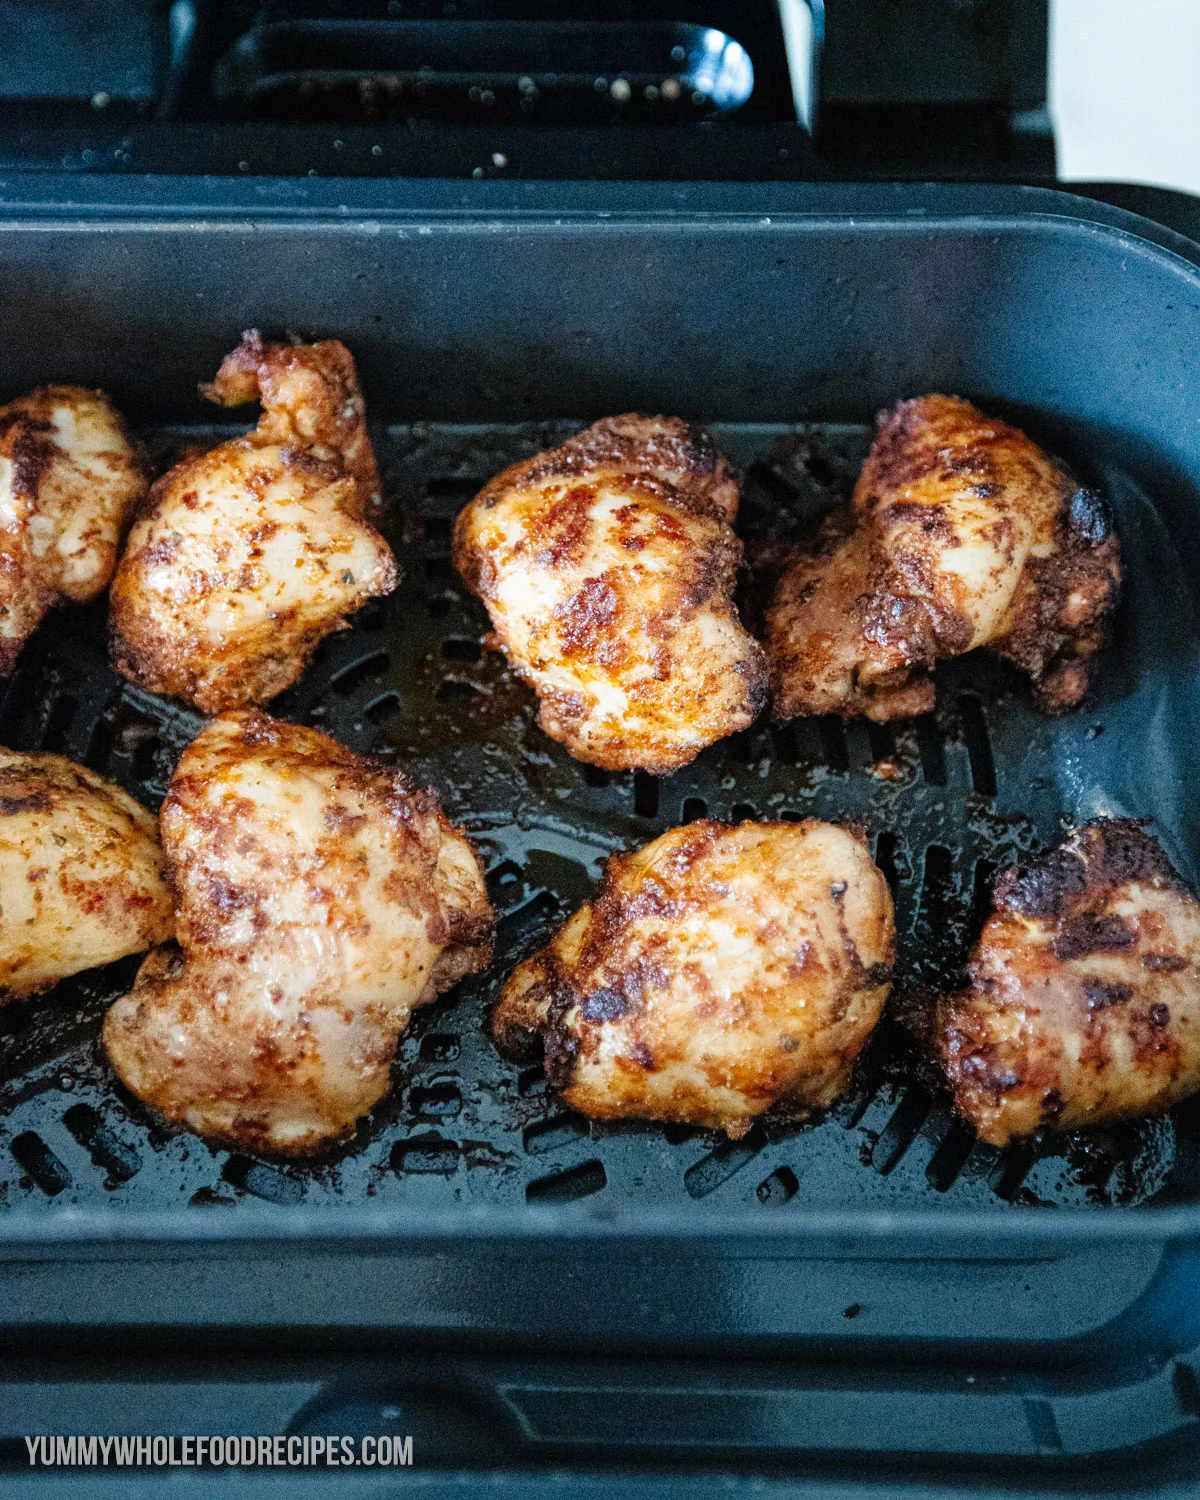
Chicken thighs tolerate higher temps well. Their fat content protects against drying. Start with bone-in, skin-on pieces.
Pat skins extremely dry. Rub with salt and pepper. Lightly brush with avocado oil.
High smoke point oils prevent burning. Olive oil burns at these temperatures.
Place thighs skin-side up initially. Set temp to 380°F. Cook for eight minutes.
Watch the skin color shift. Golden yellow appears early. Deep bronze indicates readiness for flip.
Turn carefully using tongs. Skin side down now. Increase temp to 400°F.
Cook four more minutes. Internal temp should hit 175°F. Juices run clear.
No pink near bones.
Steaks require aggressive searing. Bring meat to room temp first. Cold centers resist browning.
Season generously with coarse sea salt. Pepper last to avoid bitterness. Preheat cast iron insert to 400°F.
Lay steak flat. Do not move it. Let it sit for three minutes.
Check underside. Dark crust forms? Good.
Flip once. Three more minutes for medium-rare. Rest for five minutes.
Carryover cooking raises internal temp further. Slice against grain. Serve immediately.
â±ï¸ Chef Jessica’s Quick Recipe Snapshot
Air Fryer Verified
- Single Layer Only: Never stack or overlap in the basket; circulating high-velocity air creates the crisp barrier.
- Oil Sprayer Tip: Lightly mist with high smoke-point avocado or light olive oil (never use commercial aerosol sprays with propellants).
- Halfway Shake / Flip: Flip pieces halfway through the cycle to ensure uniform convection browning.
Fixing the Top 3 Most Common Visual Failures
Pale tops plague many users. This happens when heat doesn’t reach upper surfaces. Food sits too low in the basket.
Raise items using wire racks. Or flip earlier than recommended. Halfway checks save meals.
Don’t wait for timer completion. Inspect color progress regularly.
Soggy bottoms frustrate home cooks. Fat accumulates beneath protein. Solid baskets trap liquids.
Switch to perforated plates. Ensure drain holes align with waste tray. Empty drip trays frequently.
Grease buildup insulates heat. Clean between batches if possible. Dry foods thoroughly before cooking.
Water boils at 212°F. Browning needs 300°F+. Steam prevents both.
Burnt edges signal proximity issues. Items touch heating elements. Keep one-inch clearance everywhere.
Rotate pans during cooking. Uneven fan distribution affects zones. Left side may cook faster.
Swap positions midway. Monitor closely after fifteen minutes. Smoke alarms trigger easily.
Ventilate kitchens properly. Open windows nearby. Reduce ambient odor retention.
â±ï¸ Chef Jessica’s Quick Recipe Snapshot
Air Fryer Verified
- Single Layer Only: Never stack or overlap in the basket; circulating high-velocity air creates the crisp barrier.
- Oil Sprayer Tip: Lightly mist with high smoke-point avocado or light olive oil (never use commercial aerosol sprays with propellants).
- Halfway Shake / Flip: Flip pieces halfway through the cycle to ensure uniform convection browning.
When to Use Cast Iron Inserts vs. Perforated Plates
Cast iron wins for thick proteins needing a hard sear. The material retains heat aggressively. This creates immediate crust formation on steaks or chops.
You get distinct grill marks without special techniques. However, it requires preheating time. Five minutes is standard for most units.
Skip this step and your food sticks. It also demands careful cleaning. Residue builds up quickly in the grooves.
Perforated plates excel at airflow management. They suit vegetables, wings, and thinner cuts. Hot air circulates freely around the food.
This ensures even cooking without sogginess. Fat drips away from the surface. Your fries stay crispier longer.
Cleanup is simpler too. Most are dishwasher safe. But they lack thermal mass.
Searing power drops significantly compared to iron. Choose based on your primary ingredient. Thick meats need iron contact.
Lighter items benefit from open flow.
â±ï¸ Chef Jessica’s Quick Recipe Snapshot
Air Fryer Verified
- Single Layer Only: Never stack or overlap in the basket; circulating high-velocity air creates the crisp barrier.
- Oil Sprayer Tip: Lightly mist with high smoke-point avocado or light olive oil (never use commercial aerosol sprays with propellants).
- Halfway Shake / Flip: Flip pieces halfway through the cycle to ensure uniform convection browning.
Safety Checks for High-Heat Indoor Grilling
Never leave the appliance unattended during high-temp cycles. Temperatures above 400°F can ignite residual grease. Check the drip tray before every use.
Accumulated fat becomes fuel for fires. Wipe it down with warm soapy water. Dry thoroughly before reassembly.
Moisture causes steam bursts that scatter hot oil. Keep intake vents clear of obstructions. Blocked airflow overheats the motor housing.
This poses electrical fire risks. Manufacturer specs warn against covering these areas.
Use only oils with high smoke points. Avocado, grapeseed, or refined coconut work best. Olive oil burns at these temperatures.
Burning oil releases harmful acrolein compounds. Ventilate your kitchen adequately. Open windows or run exhaust fans.
Smoke detectors should be functional nearby. Test them monthly for reliability. Unplug the unit when not in use.
Standby mode still draws minimal power. Surge protection helps extend component life. Follow these steps to prevent accidents.
Safety remains paramount in compact kitchens.
â±ï¸ Chef Jessica’s Quick Recipe Snapshot
Air Fryer Verified
- Single Layer Only: Never stack or overlap in the basket; circulating high-velocity air creates the crisp barrier.
- Oil Sprayer Tip: Lightly mist with high smoke-point avocado or light olive oil (never use commercial aerosol sprays with propellants).
- Halfway Shake / Flip: Flip pieces halfway through the cycle to ensure uniform convection browning.
FAQs on Timing, Oil, and Doneness Indicators
How do I know when chicken is fully cooked?
Visual cues trump timers every time. Cut into the thickest part. Juices must run completely clear.
No pink tint should remain near bones. Internal temperature needs to hit 165°F. Use an instant-read thermometer for accuracy.
Skin should look deep golden brown. If it’s pale, cook another two minutes. Overcooking dries out meat fast.
Trust the color and juice test.
Can I use aluminum foil instead of perforated plates?
Yes, but poke holes in it first. Solid foil blocks essential airflow. Steam gets trapped underneath the food.
This leads to soggy textures everywhere. Perforate the sheet generously. Ensure it doesn’t touch the heating element.
Loose foil can blow into the fan. Weigh it down with heavy ingredients. Never let it obstruct vent paths.
Direct contact causes melting hazards. Stick to dedicated accessories when possible.
Why does my air fryer smell like burning plastic?
New appliances often emit odors initially. Run an empty cycle at 400°F. Leave the door slightly ajar.
Ventilation clears volatile organic compounds. Persistent smells suggest residue buildup. Clean all removable parts thoroughly.
Check for forgotten packaging materials. Burnt food particles cause lingering scents. Scrub the basket interior gently.
Avoid abrasive cleaners on non-stick coats. Regular maintenance prevents odor accumulation.
🟠Chef Recommended: Oil Misters & Non-Stick Air Fryer Liners
Get maximum crunch with minimal oil while protecting your basket coating from sticky residue and propellant damage:
- Refillable Glass Oil Sprayer:Check Glass Oil Misters on Amazon →
- Reusable Silicone Air Fryer Liners:Check Reusable Silicone Liners on Amazon →
*FTC Disclosure: As an Amazon Associate, Air Fry Process earns from qualifying purchases.*
📖 Related Crispy Air Fryer Recipes:

Similar Posts