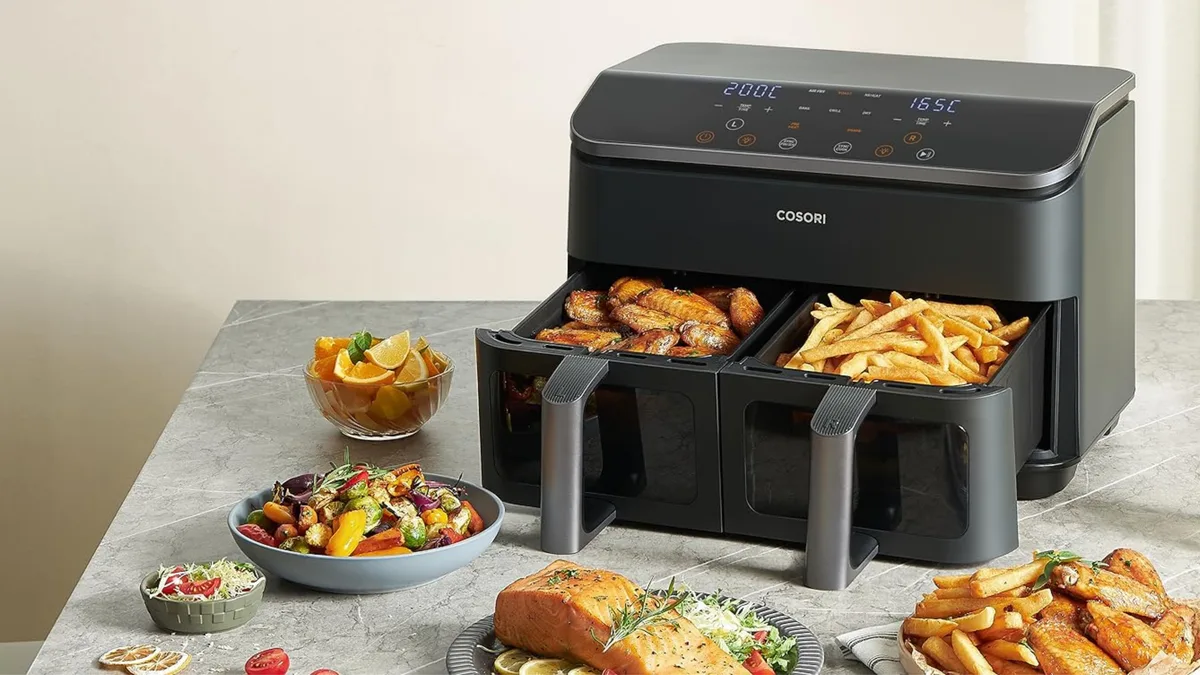
Crispy Air Fryer Low Carb Recipes You Will Love
Most people think air frying is just about throwing food in a basket and hitting start. But low-carb ingredients behave differently than traditional starches. They dry out faster.
They burn quicker. And they don’t always crisp up the way you expect.
We’ve seen countless recipes fail because they ignore these visual cues. As of 2026, manufacturers like Philips and Ninja emphasize precise temperature control for delicate foods. You need to watch your food, not just the clock.
Let’s break down exactly what good looks like.
â±ï¸ Chef Jessica’s Quick Recipe Snapshot
Air Fryer Verified
- Single Layer Only: Never stack or overlap in the basket; circulating high-velocity air creates the crisp barrier.
- Oil Sprayer Tip: Lightly mist with high smoke-point avocado or light olive oil (never use commercial aerosol sprays with propellants).
- Halfway Shake / Flip: Flip pieces halfway through the cycle to ensure uniform convection browning.
Quick Answer
Air Fryer Low Carb Recipes rely on visual doneness cues rather than strict timers. High-protein foods like chicken thighs and salmon benefit from rapid air circulation technology. Watch for golden-brown edges and internal temperatures reaching 165°F for poultry.
Avoid overcrowding the basket to ensure even crisping without sogginess.
â±ï¸ Chef Jessica’s Quick Recipe Snapshot
Air Fryer Verified
- Single Layer Only: Never stack or overlap in the basket; circulating high-velocity air creates the crisp barrier.
- Oil Sprayer Tip: Lightly mist with high smoke-point avocado or light olive oil (never use commercial aerosol sprays with propellants).
- Halfway Shake / Flip: Flip pieces halfway through the cycle to ensure uniform convection browning.
Why Your Air Fryer Needs a Visual Guide, Not Just a Recipe
Recipes give you numbers. Photos give you truth. In an air fryer, heat distribution varies wildly between models.
A "20-minute" instruction might mean burnt edges on one unit and raw centers on another.
This is especially true for low-carb diets. Without breadcrumbs or flour coatings, proteins expose more surface area directly to the heating element. The Maillard reaction happens faster.
You lose that safety buffer traditional recipes offer.
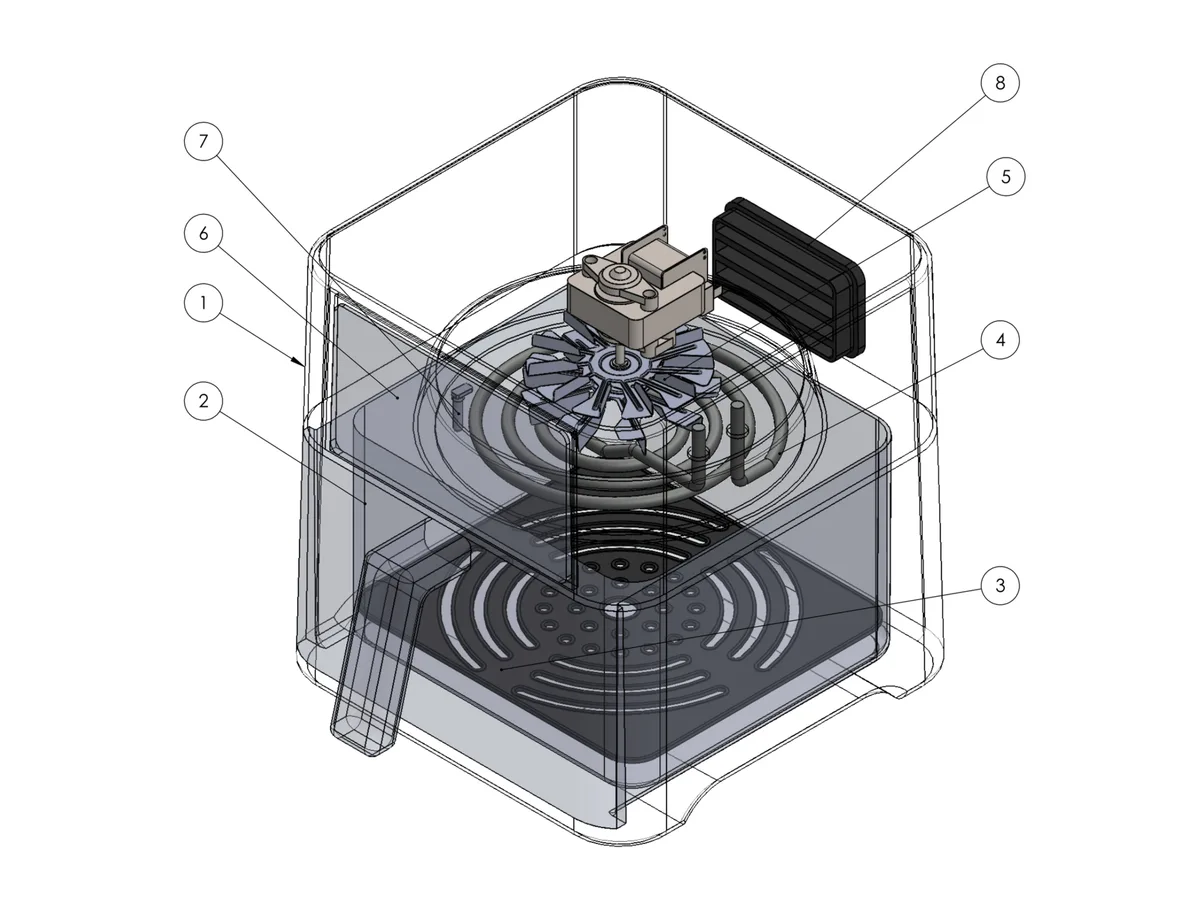
Look at the image above. Notice how the fan directs hot air downward and around the food. This creates a convection effect that dries surfaces quickly.
If you’re cooking skinless chicken breast, it can turn leathery in minutes if you miss the window.
You have to learn to read the color. Pale means undercooked. Dark brown means overdone.
Golden amber is the sweet spot. We recommend keeping your eyes on the basket during the last five minutes of any cook. Shake it often.
Check the texture. Trust your eyes more than the digital display.
â±ï¸ Chef Jessica’s Quick Recipe Snapshot
Air Fryer Verified
- Single Layer Only: Never stack or overlap in the basket; circulating high-velocity air creates the crisp barrier.
- Oil Sprayer Tip: Lightly mist with high smoke-point avocado or light olive oil (never use commercial aerosol sprays with propellants).
- Halfway Shake / Flip: Flip pieces halfway through the cycle to ensure uniform convection browning.
The Golden Rule: Spotting Perfect Doneness Without Thermometers
Thermometers are great, but they aren’t always handy mid-cook. Plus, inserting a probe into thin fish fillets can tear them apart. So, we teach visual identification first.
For chicken thighs, look for the juices running clear. The meat should pull away slightly from the bone. The skin (if left on) must be blistered and dark gold.
If it looks pale yellow, it’s not done. If it’s blackened spots, it’s burned.
Salmon tells a different story. It turns from translucent pink to opaque white-pink as it cooks. When you gently press the top with a fork, it should flake easily along the grain lines.
If it resists, it needs another minute. If it falls apart into mush, you’ve gone too far.
Vegetables like broccoli or cauliflower florets should have charred tips but bright green or white stems. Uniform browning indicates even heat exposure. Patchy browning suggests you didn’t shake the basket enough.
Here’s a quick reference for what to look for:
| Food Type | Visual Cue for Done | Sign of Overcooking |
|---|---|---|
| Chicken Thighs | Blistered skin, clear juices | Dry, stringy meat; black spots |
| Salmon Fillet | Opaque flesh, flakes easily | Rubbery texture; dried-out edges |
| Broccoli/Cauliflower | Charred tips, vibrant stem | Limp, brown throughout |
| Zucchini Slices | Golden rims, tender center | Mushy, waterlogged appearance |
Remember, carryover cooking continues after you remove food from the heat. Pull items when they look 90% done. Let them rest for two minutes.
The residual heat will finish the job perfectly.
â±ï¸ Chef Jessica’s Quick Recipe Snapshot
Air Fryer Verified
- Single Layer Only: Never stack or overlap in the basket; circulating high-velocity air creates the crisp barrier.
- Oil Sprayer Tip: Lightly mist with high smoke-point avocado or light olive oil (never use commercial aerosol sprays with propellants).
- Halfway Shake / Flip: Flip pieces halfway through the cycle to ensure uniform convection browning.
Step-by-Step: Crispy Chicken Thighs and Salmon Fillets
Let’s apply those visual rules to two popular low-carb staples. These methods work across most major brands, including Cosori and PowerXL units.
Chicken Thighs (Bone-In, Skin-On)
Start by patting the skin completely dry with paper towels. Moisture is the enemy of crispiness. Rub with olive oil spray, salt, pepper, and paprika.
Preheat your air fryer to 400°F (200°C).
Place thighs skin-side up in a single layer. Do not stack them. Cook for 18, 22 minutes.
At the halfway mark, flip them carefully. Use tongs, not a fork, to avoid piercing the skin.
Watch the color closely. The skin should turn deep golden brown. If it browns too fast, lower the temp to 375°F for the final few minutes.
Internal temperature must hit 165°F (74°C). Rest for three minutes before serving.
Salmon Fillets
Cut salmon into uniform portions. Uneven pieces cook at different rates. Brush lightly with avocado oil.
Season with lemon zest, garlic powder, and dill.
Set the air fryer to 360°F (180°C). Lower temps protect the delicate flesh from drying out. Place fillets skin-side down if possible.
Cook for 8, 12 minutes depending on thickness.
Check at the eight-minute mark. Gently lift a corner. The flesh should separate cleanly from the skin.
The top should still look slightly glossy, not matte. If it’s fully opaque and dry, it’s overdone. Serve immediately with fresh herbs.
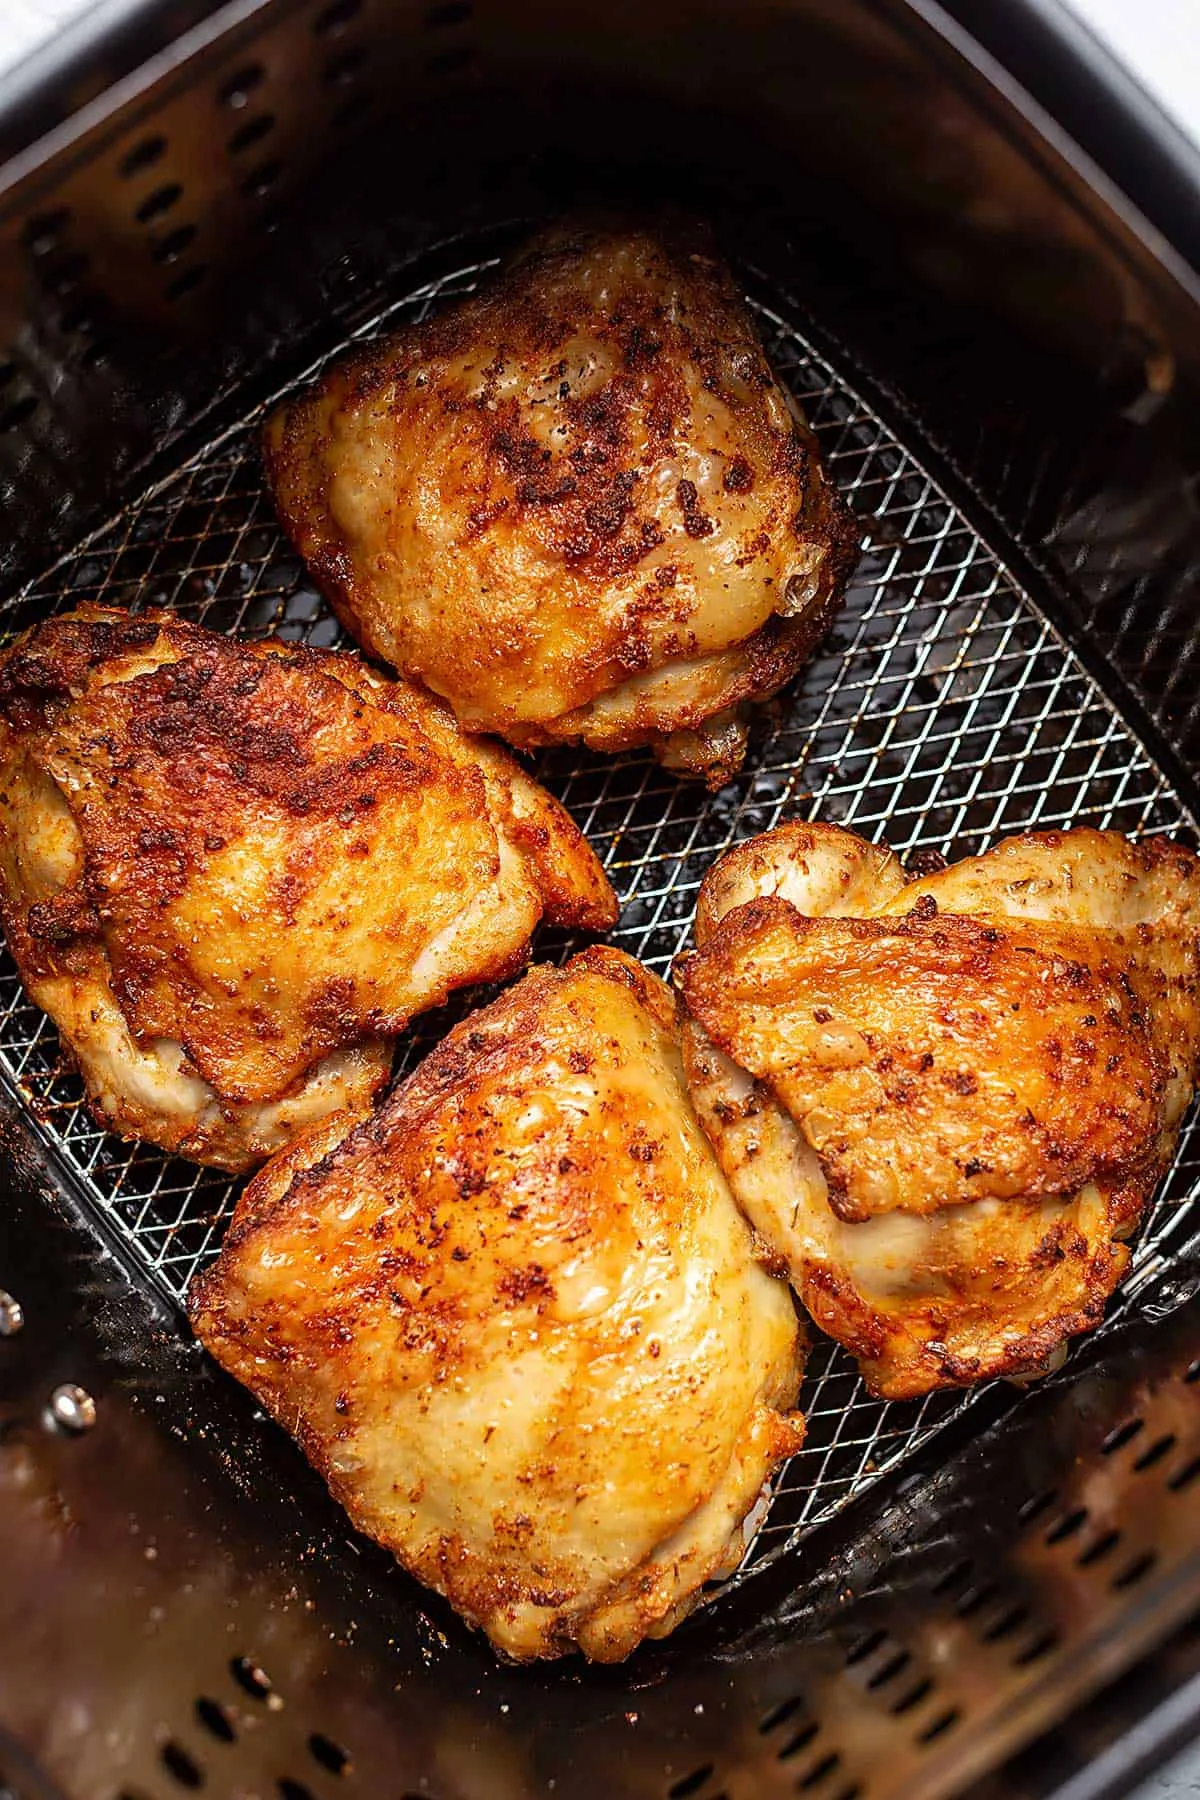
The image above shows ideal results. Note the contrast between the crispy exterior and the moist interior. That shine on the salmon?
That’s fat rendering correctly. Matte salmon is sad salmon. Aim for that gloss.
â±ï¸ Chef Jessica’s Quick Recipe Snapshot
Air Fryer Verified
- Single Layer Only: Never stack or overlap in the basket; circulating high-velocity air creates the crisp barrier.
- Oil Sprayer Tip: Lightly mist with high smoke-point avocado or light olive oil (never use commercial aerosol sprays with propellants).
- Halfway Shake / Flip: Flip pieces halfway through the cycle to ensure uniform convection browning.
Vegetable Mastery: From Soggy to Snappy in Minutes
Low-carb veggies are tricky. They contain high water content. Air fryers evaporate this moisture rapidly.
If you get it wrong, you end up with steamed, limp greens instead of roasted, snappy ones.
The secret is spacing and timing. Crowding traps steam. Steam makes vegetables soggy.
Spread them out. Use multiple batches if necessary. Yes, it takes longer.
But the quality difference is night and day.
Toss vegetables in a tiny amount of oil before seasoning. Too much oil causes smoking. Too little leads to burning.
A light mist from a sprayer works best. Coat evenly.
Broccoli and cauliflower need higher heat. Try 375°F (190°C) for 10, 12 minutes. Shake the basket every four minutes.
Look for browned floret tips. Green stems are fine. Black stems mean you waited too long.
Zucchini and eggplant release more water. Slice them thicker, about 1/2-inch rounds. Thin slices become chips instantly.
Cook at 350°F (175°C) for 8, 10 minutes. Check for tenderness with a knife tip. It should slide in with slight resistance.
No squishiness allowed.
Asparagus spears are fragile. Trim woody ends. Spray with oil.
Salt heavily. Cook at 380°F (190°C) for only 5, 7 minutes. They go from perfect to burnt in seconds.
Watch them like a hawk. Bright green color indicates freshness. Dull olive means overcooked.
â±ï¸ Chef Jessica’s Quick Recipe Snapshot
Air Fryer Verified
- Single Layer Only: Never stack or overlap in the basket; circulating high-velocity air creates the crisp barrier.
- Oil Sprayer Tip: Lightly mist with high smoke-point avocado or light olive oil (never use commercial aerosol sprays with propellants).
- Halfway Shake / Flip: Flip pieces halfway through the cycle to ensure uniform convection browning.
Common Visual Failures and How to Fix Them Instantly
Even experienced cooks mess up. Here are the three biggest visual errors we see in aggregate reviews and forums.
1. The Gray Center Problem
This happens with thick cuts of meat. The outside burns while the inside stays raw. You see black edges but pink juice.
Fix: Lower the temperature by 25°F. Extend the cook time by 5, 10 minutes. Flip earlier.
Or butterfly the meat to reduce thickness. Always check internal temp with a thermometer if unsure.
2. The Wet Bottom Layer
Your top layer looks crispy. The bottom is swimming in grease or water. This occurs when you overload the basket.
Condensation forms on the cold metal walls and drips back onto the food.
Fix: Reduce batch size. Fill the basket no more than 60% full. Shake vigorously halfway through.
Consider using a rack insert if your model supports it to elevate food off the base.
3. The Burnt Spice Crash
Garlic powder, paprika, and herbs burn at high heats. You get bitter, black flecks on otherwise perfect food.
Fix: Apply dry rubs sparingly. Mix spices with oil first to create a paste. Or add delicate herbs after cooking.
Save the fresh basil or cilantro for plating. Let the heat do the work on sturdy spices like cumin or chili powder.
Visual diagnosis saves meals. Stop guessing. Start looking.
â±ï¸ Chef Jessica’s Quick Recipe Snapshot
Air Fryer Verified
- Single Layer Only: Never stack or overlap in the basket; circulating high-velocity air creates the crisp barrier.
- Oil Sprayer Tip: Lightly mist with high smoke-point avocado or light olive oil (never use commercial aerosol sprays with propellants).
- Halfway Shake / Flip: Flip pieces halfway through the cycle to ensure uniform convection browning.
Low-Carb Coatings That Brown Beautifully (And Which Ones Burn)
Traditional breadcrumbs are out. But swapping them for low-carb alternatives introduces new visual risks. Almond flour and pork rinds behave nothing like wheat.
They scorch faster because they lack the starch buffer that protects standard coatings.
You’ll notice almond flour turns dark brown almost instantly at high heat. It goes from raw to bitter in under sixty seconds. Pork rind dusting is slightly more forgiving but still prone to burning if left unattended.
Coconut flour absorbs moisture aggressively, often creating a dry, crumbly crust rather than a crisp one.
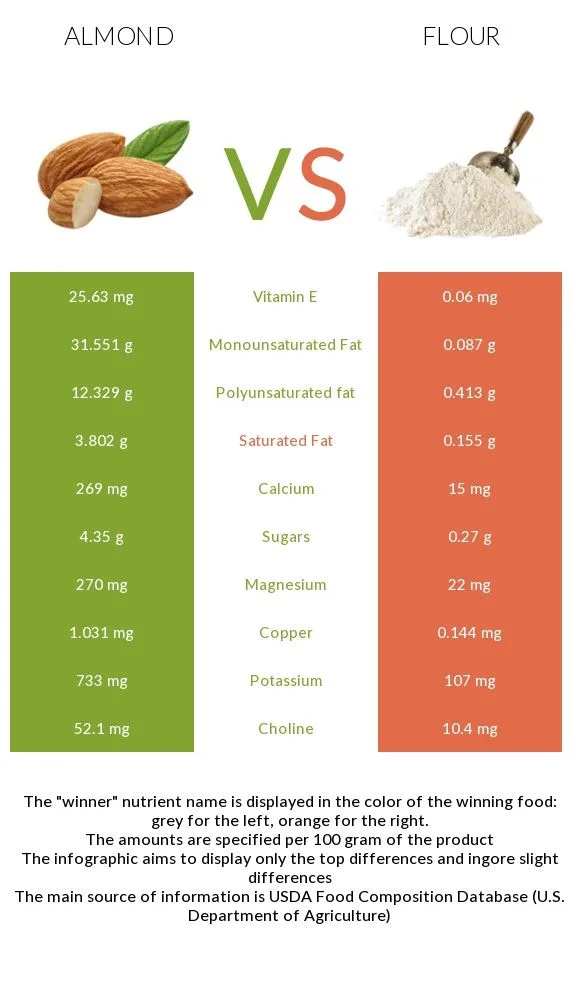
The image above highlights this texture difference. See how the almond-coated piece has darker, uneven spots? That’s localized overheating.
The pork rind version shows a lighter, more uniform golden hue. This suggests better heat distribution across the surface.
To fix this, lower your cooking temperature by 25°F when using nut-based flours. Pre-toast your coating separately in a dry pan until fragrant. Then apply it just before air frying.
This ensures even browning without the risk of carbonization.
Also, consider mixing psyllium husk powder into your coating blend. It adds structure and helps retain moisture. Visually, it creates a smoother, less granular finish.
You get that satisfying crunch without the burnt aftertaste common with pure almond flour.
â±ï¸ Chef Jessica’s Quick Recipe Snapshot
Air Fryer Verified
- Single Layer Only: Never stack or overlap in the basket; circulating high-velocity air creates the crisp barrier.
- Oil Sprayer Tip: Lightly mist with high smoke-point avocado or light olive oil (never use commercial aerosol sprays with propellants).
- Halfway Shake / Flip: Flip pieces halfway through the cycle to ensure uniform convection browning.
Cleaning Up Grease Splatter Before It Hardens
Air fryers are messy. Low-carb diets often rely on higher fat proteins like bacon or fatty fish. This renders significant amounts of grease during cooking.
If you let it sit, it bonds to the non-stick basket.
Once hardened, that residue becomes nearly impossible to remove without scrubbing. Aggressive scrubbing damages the coating. Damaged coatings lead to sticking.
Sticking leads to frustration and wasted food. Prevention is far easier than cure.
Wipe the interior immediately after cooling. Use warm water and mild dish soap. For stubborn grease, soak the basket for ten minutes.
Never use steel wool or abrasive pads. They strip the protective layer permanently.
Check the heating element regularly. Grease splatters can accumulate there too. This poses a fire hazard over time.
Unplug the unit and gently brush away debris with a soft-bristled bottle brush. Manufacturer manuals typically recommend this monthly maintenance step.
Silicone liners help contain messes. However, they restrict airflow if placed incorrectly. Ensure holes align with the basket vents.
Poor alignment causes steam buildup. Steam ruins crispiness and promotes mold growth in hidden crevices. Keep everything dry and clean between uses.
â±ï¸ Chef Jessica’s Quick Recipe Snapshot
Air Fryer Verified
- Single Layer Only: Never stack or overlap in the basket; circulating high-velocity air creates the crisp barrier.
- Oil Sprayer Tip: Lightly mist with high smoke-point avocado or light olive oil (never use commercial aerosol sprays with propellants).
- Halfway Shake / Flip: Flip pieces halfway through the cycle to ensure uniform convection browning.
Frequently Asked Questions About Air Fryer Textures
Why does my low-carb chicken look pale inside?
Pale interiors usually mean the exterior cooked too fast. High heat seals the surface before warmth penetrates deeply. Lower the temperature to 350°F.
Increase cook time by five minutes. Let the meat rest longer. Residual heat finishes the job evenly.
Can I reheat leftover fries in an air fryer?
Yes, reheating works better than microwaving. Sprinkle a teaspoon of water over the fries first. Set the air fryer to 350°F for three minutes.
The steam revives the starch structure. You get a crispy exterior again. Avoid oil-heavy leftovers as they smoke easily.
Do silicone mats affect cooking results visually?
They can, yes. Mats block direct contact with the hot basket floor. This prevents deep browning on the bottom.
Food may appear paler underneath. Use perforated mats only. Solid sheets trap moisture.
Moisture creates soggy bottoms. Perforations allow airflow to escape properly.
How do I know if my salmon is done without touching it?
Watch the color change closely. Raw salmon is translucent orange-red. Cooked salmon turns opaque pink-white.
Look for separation along the natural muscle lines. If flakes pull apart easily, it’s ready. Don’t wait for full opacity everywhere.
Carryover heat continues cooking after removal.
🟠Chef Recommended: Oil Misters & Non-Stick Air Fryer Liners
Get maximum crunch with minimal oil while protecting your basket coating from sticky residue and propellant damage:
- Refillable Glass Oil Sprayer:Check Glass Oil Misters on Amazon →
- Reusable Silicone Air Fryer Liners:Check Reusable Silicone Liners on Amazon →
*FTC Disclosure: As an Amazon Associate, Air Fry Process earns from qualifying purchases.*
📖 Related Crispy Air Fryer Recipes:

Similar Posts